FORMS XD App User Guide
Compatibility
-
The FORMS XD App runs on both iPad and iPhone
-
The App is currently supported on both iOS 13 and 14. The App does also run on iOS 11.1 onwards
iOS Settings
The standard iOS settings on the device provide a number of options for FORMS that can prove useful.
ALLOW FORMS TO ACCESS:
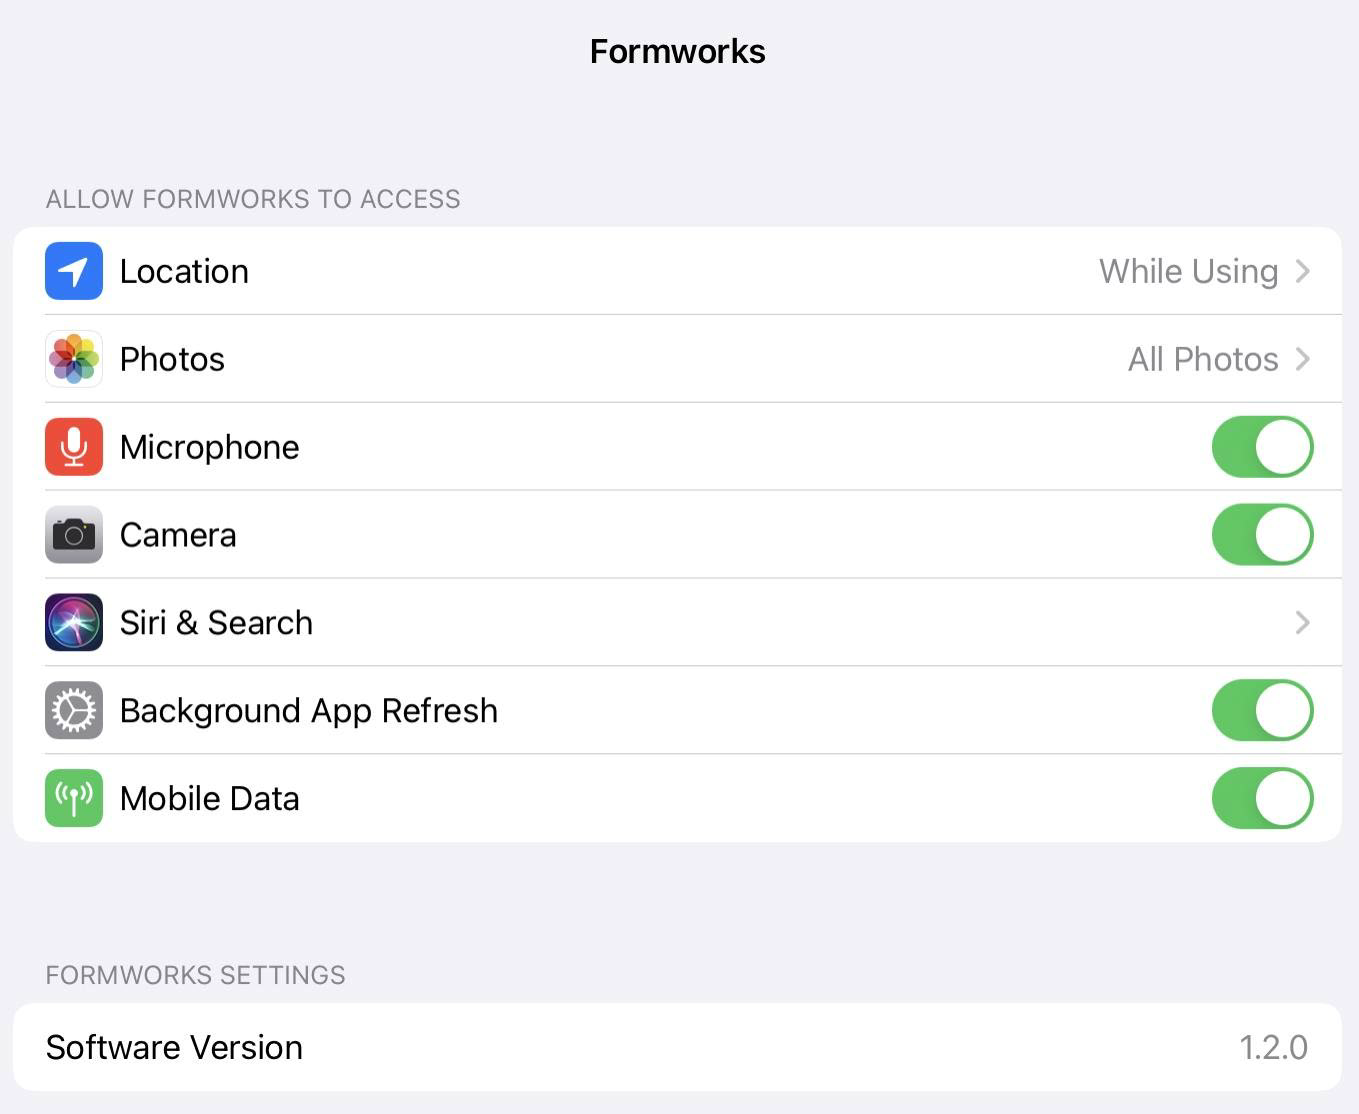
Location
recording where forms are actioned or particular data elements are captured.
Photos
Permits FORMS to access the device’s photo storage area. Can be set for read and/or write
Microphone
Grants FORMS access to the device microphone for audio recording enabled FORMS templates.
Camera
Grants access to the device camera for templates that contain Photo elements.
Background App Refresh
This enables the App to sync whilst in background mode.
Mobile Data
Enables the App to sync via mobile data.
The FORMS XD App
Accessing the FORMS App
Password Setting
User accounts for the FORMS App are created by the FORMS administrator for your company.
Users receive a welcome email when the FORMS account is created. The email contains a temporary password to allow users to log-in online to the Formwork Portal and set their password. The user name for the FORMS App is your email address.
Accessing the App
-
The App can be downloaded from the Apple Appstore or, for enterprise clients, downloaded via MDM services or from the FORMS Portal.
-
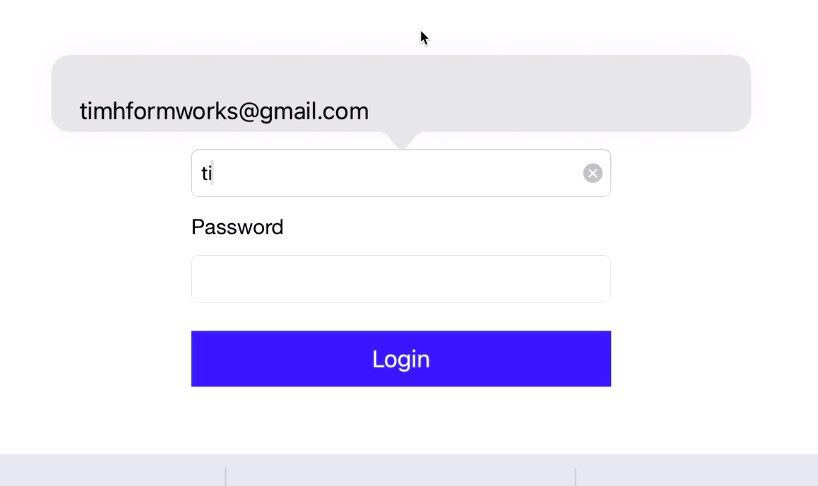
Tapping the FORMS icon on the device opens the FORMS Log In screen.
-
Both The Username (email address) and password are required to log-in.
-
The device must be online for the User’s first log-in. Subsequent log-ins may be offline.
-
If the user has previously logged into FORMS, their email address will appear above the input field, for easy selection.
Saving passwords
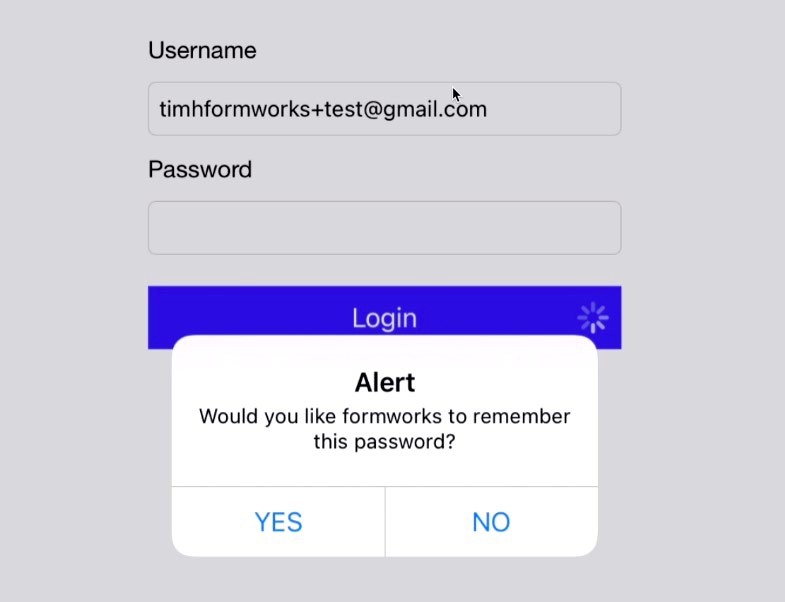
If the option to save passwords has been enabled at client account level, the device user will be presented with a dialogue box, providing the option of saving the current password.
The user has the option from the Information screen in the FORMS application, to turn saving passwords off.
Password Reset
-
Tap the FORMS icon on the tablet device. The FORMS Log In screen is displayed.
-
Type in the username (email address).
-
Click Reset Password. An email is sent to the email address with further instructions.
FORMS App Navigation
FORMS Home Screen
On initial log-in, the folder screen displays, and, if online, the App will sync with the server.
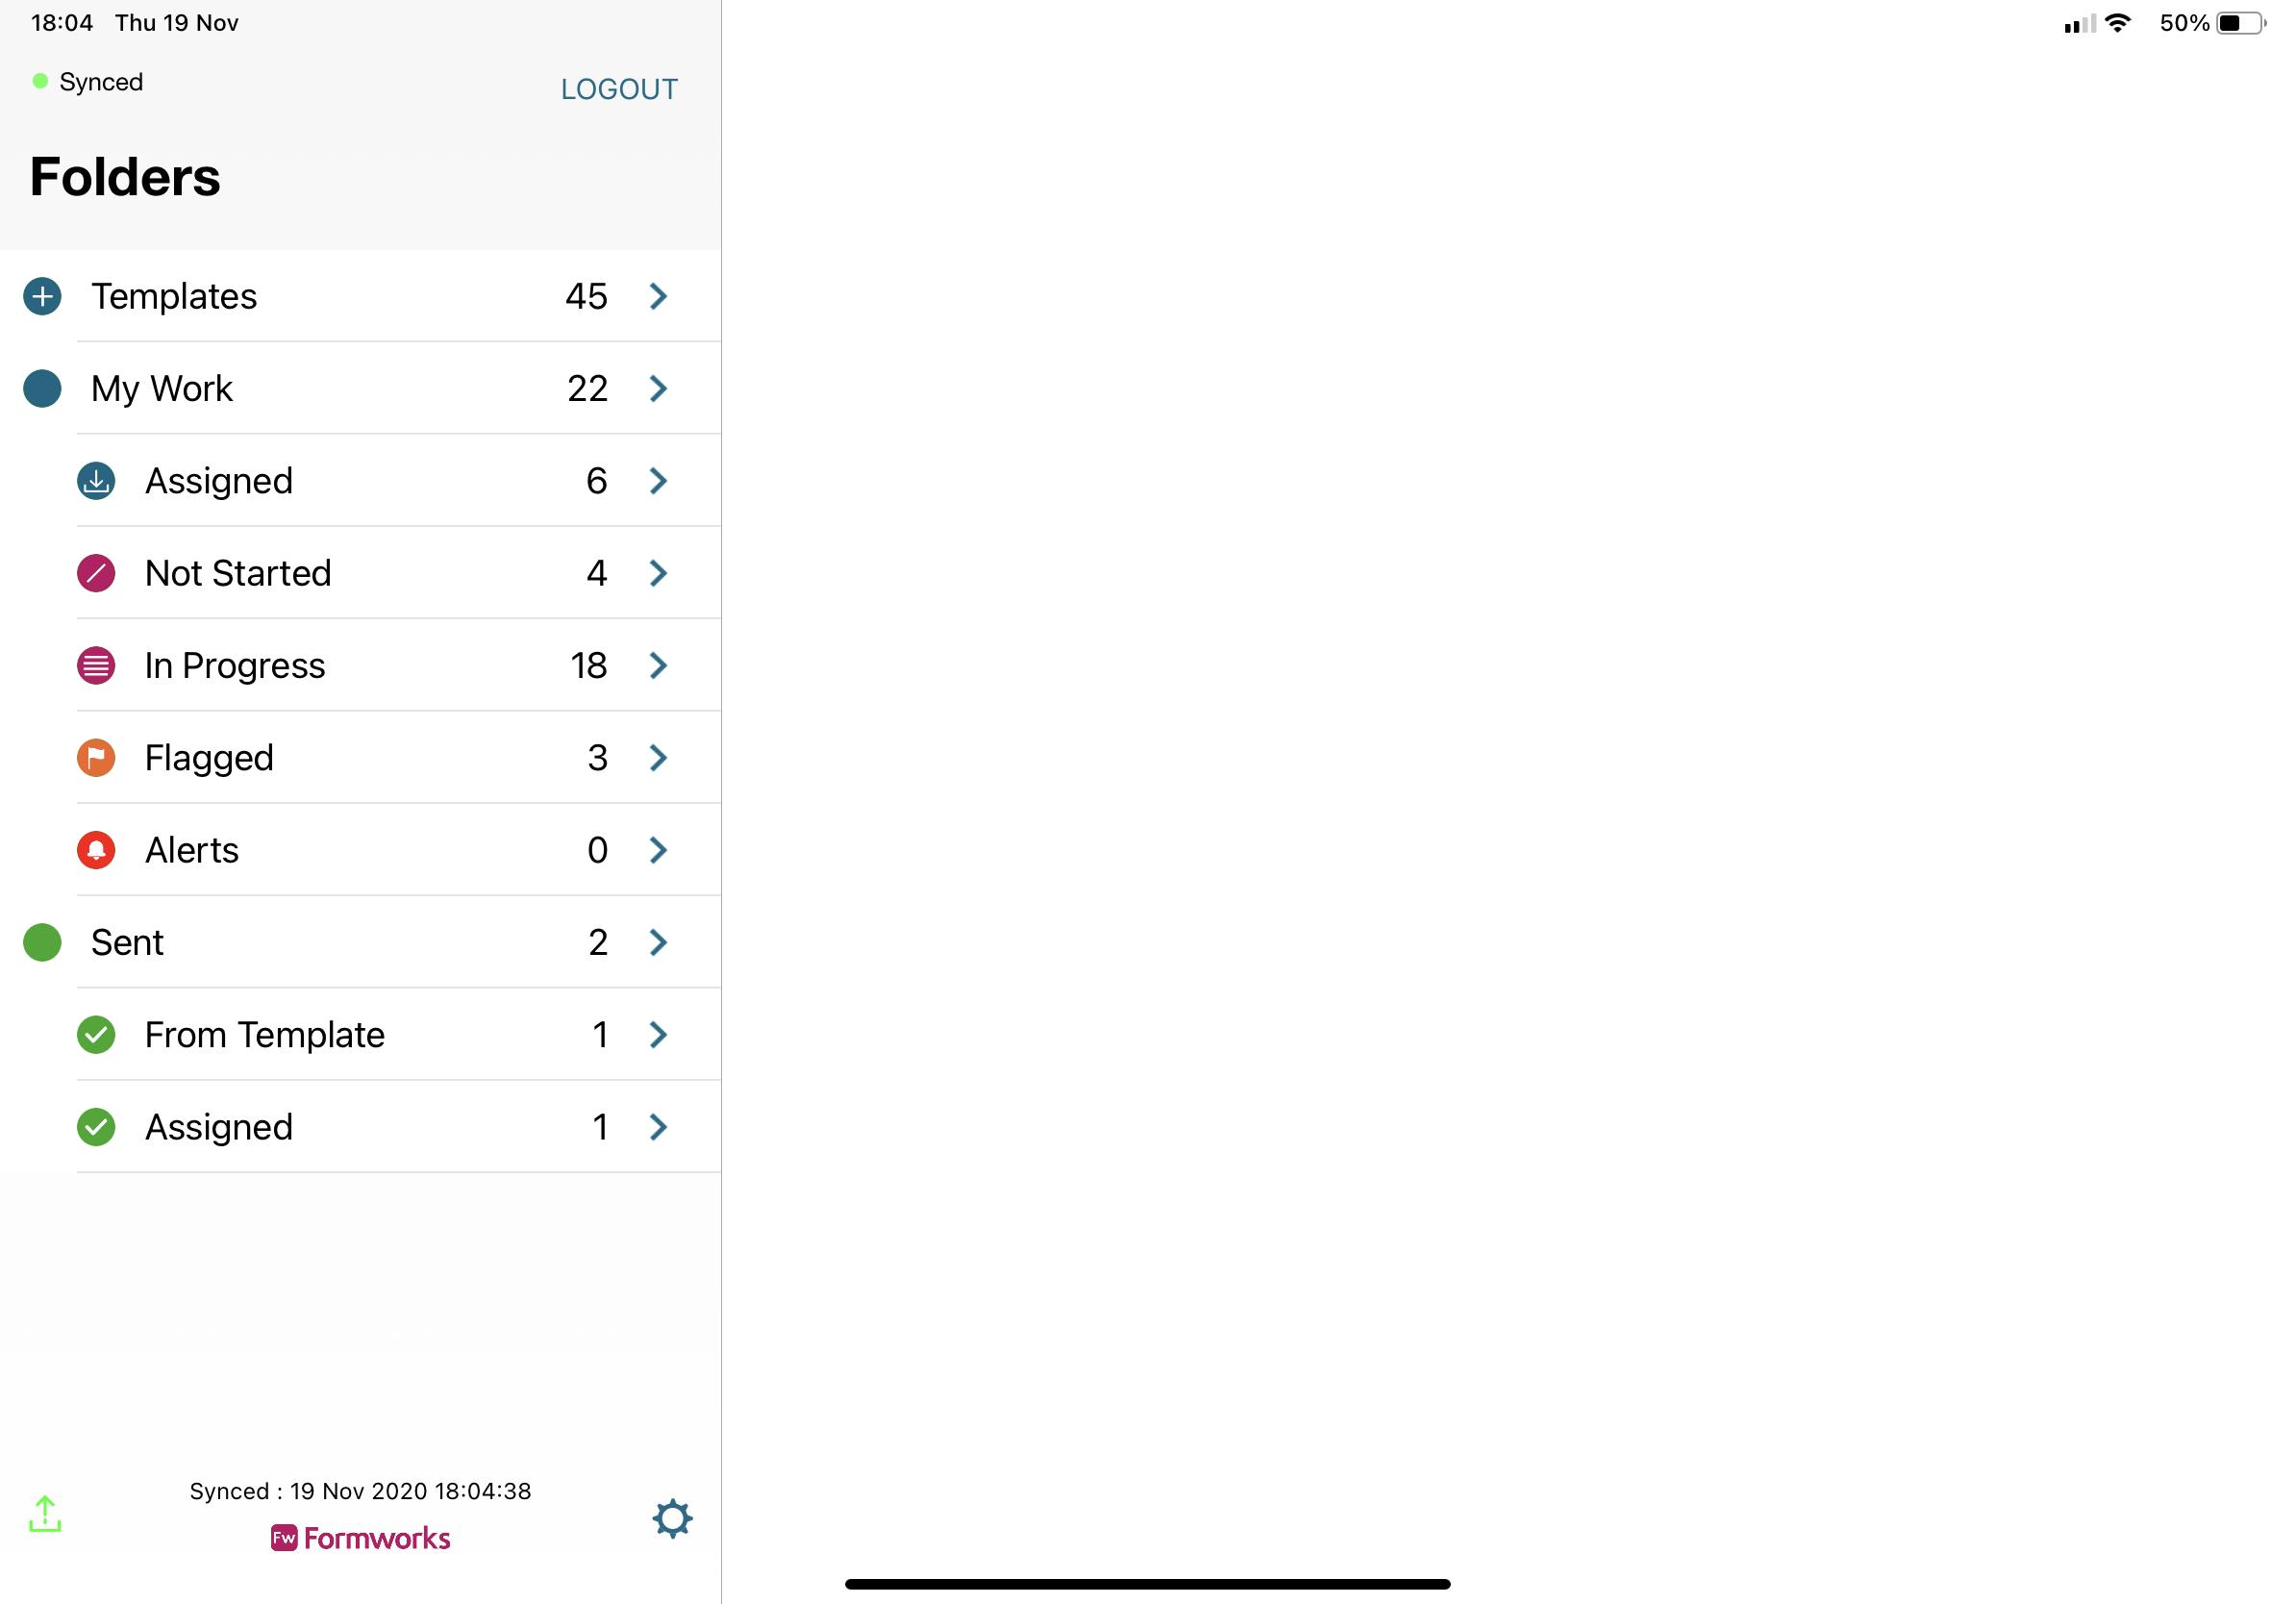
On logging in, the user sees:
-
A main menu and folder structure that enables navigation to form templates.
-
Syncing information - showing App sync status with the FORMS portal
-
Log-out option
-
Access to the App settings and information via a gear icon
Menu / Folder Structure
The menu structure contains the following default folders:
|
Folder Name |
Folder Content |
Icon |
|
Templates |
Blank templates that the user has been given access to. These templates can be selected by the user for completion. |
|
|
My Work |
All form templates that have been assigned to the user or are in progress |
|
|
Assigned |
Forms that have been assigned to the user, containing pre-filled data |
|
|
Not Started |
Assigned forms that have been received but not started |
|
|
In Progress |
All forms that have been started and saved, but not submitted |
|
|
Flagged |
Assigned or in progress forms that have been flagged by the user on the App |
|
|
Alerts |
Forms that have been forwarded from the FORMS Cloud Hub to the user for action |
|
|
Sent |
All forms that have been submitted |
|
|
From Template |
Forms started from a blank template that have been submitted |
|
|
Assigned |
Assigned forms that have been submitted |
|


Once opened, folders can be filtered and sorted to assist with the management of tasks and form completion - see Folder Filtering.
Custom folders can also be created by the user - see “Creating Custom Folders”
Templates Folder
Tapping the templates folder shows a list of blank form templates that can be selected by the user and completed.
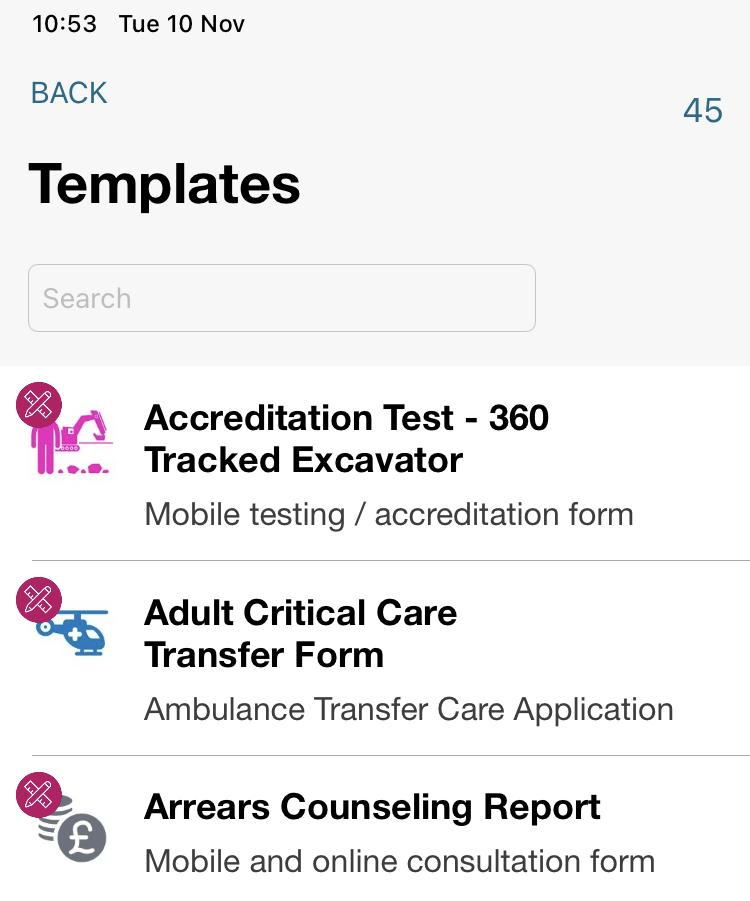
The number of templates available is stated at the top of the list
Tapping on a template selects and opens it
The following information is provided for each template listing:
-
Template icon
-
Template title
-
Template description

Specific templates can be searched for using the search field
My Work Folder
The My Work folder shows all form templates that have been assigned to the user or are in progress.
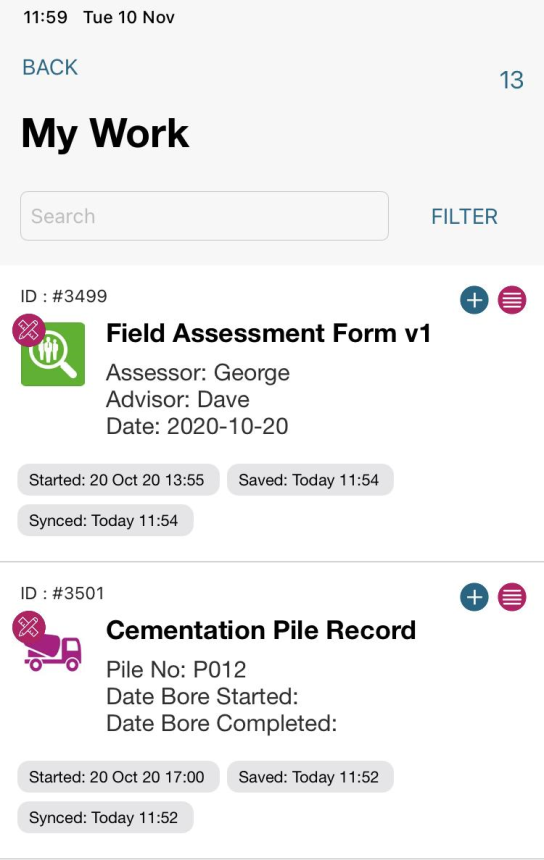
Each listing includes:
-
Unique form ID - provided by the server on the first sync
-
Form title
-
Reference text - reflecting data captured on the form
-
Form status information - start, saved and server sync times
-
Form origin and status icons including:
|
From template |
|
|
From assigned |
|
|
Not started - synced to server |
|
|
In progress - synced to server |
|
|
In progress - awaiting up-sync |
|

Assigned and Not Started Sub-Folders
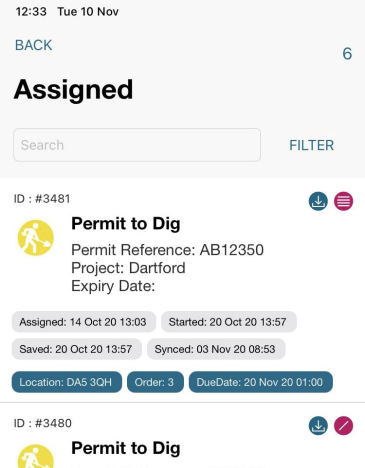
The Assigned folder includes forms that have been assigned to the user, containing pre-filled data. These may be not started or in progress.
Not Started folders will include Assigned forms that have not been started or blank forms that have been started but are still in preview mode. Each listing includes data previously described. However,Assigned forms may also have additional meta data which is shown via the blue meta tags.
Meta data is generally used for job management activities and is customised to suit the client requirements.
Meta data may be used for filtering and ordering work.
Flagged Sub-Folder
This Folder displays forms that have been flagged.
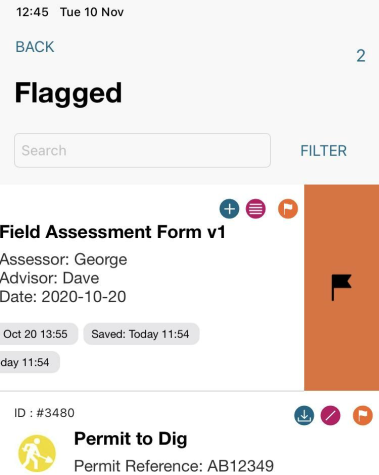
Forms are flagged / unflagged by dragging the listing to the left and tapping the flag symbol. Flagged forms will also display in other folders that are relevant - e.g. in progress etc.
A flagged form is designated by the orange flag icon in the top right hand corner of the listing.
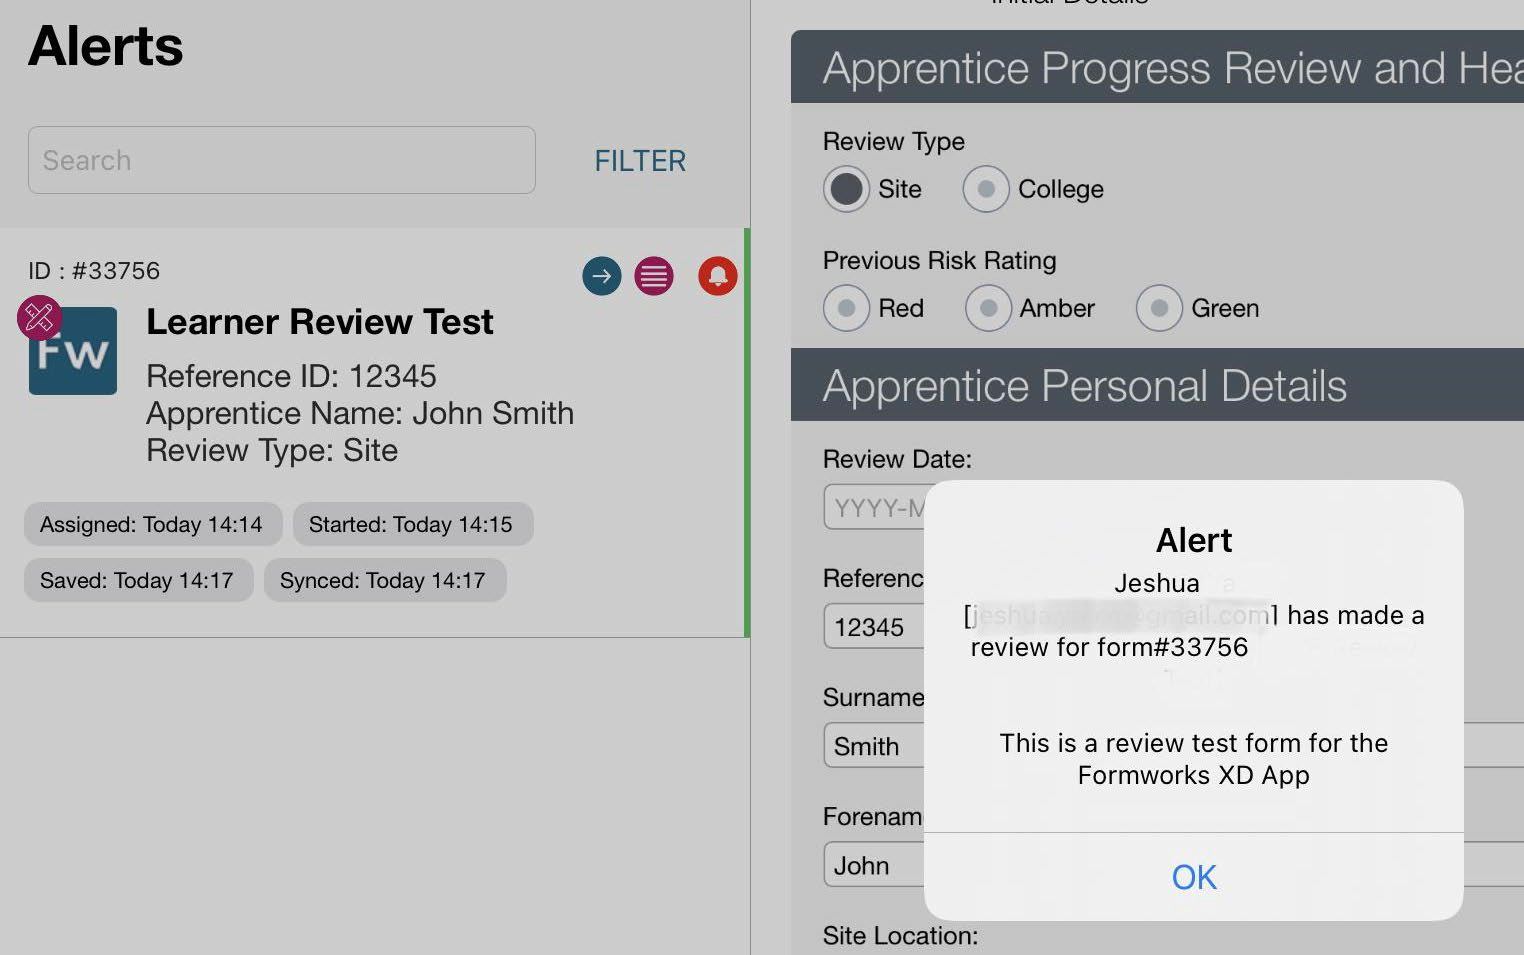
Alert Sub-Folder
This Folder displays forms that have been been forwarded from the FORMS Cloud Hub to the user for action. These forms also exist in the Assigned and In Progress folders. Tapping on the red bell icon, pops the alert message associated with the form.
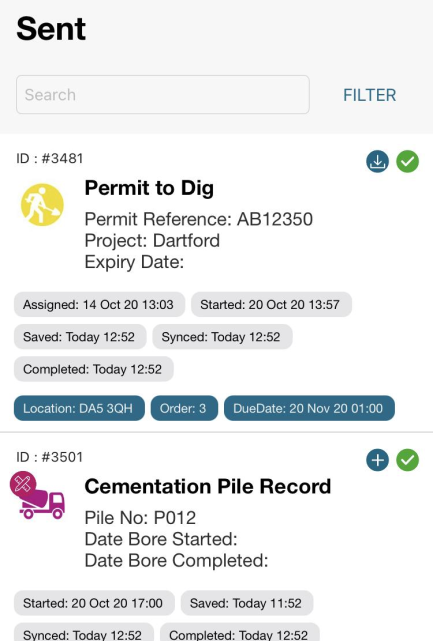
Sent Folders
The Sent folders show form templates that have been completed and submitted to the server. Each listing includes data previously described plus:
-
the completed (submitted) date/time
-
submitted status icons including:
|
Submitted - synced with server |
|
|
Submitted - awaiting sync with the server |
|

Depending on the form configurations, submitted forms may be opened again for resubmission, opened for viewing only or may be locked.
Forms that cannot be opened and submitted more than once will appear greyed out.
The length of time that submitted forms will continue to display, depends on individual client settings in the FORMS portal, but this defaults to 30 days.
Searching, Filtering, Ordering and Creating Folders
All folders have a search capability at the top of the list to enable users to quickly find forms they require. 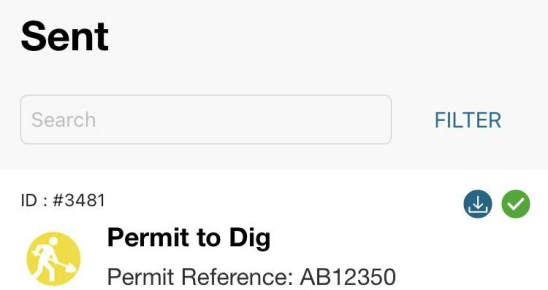
The field will search on:
-
Form ID
-
Form Title
-
Reference text
In addition to the search field, all folders (except the Template folder) have a filter option next to the search field. Tapping this opens a filter dialogue.
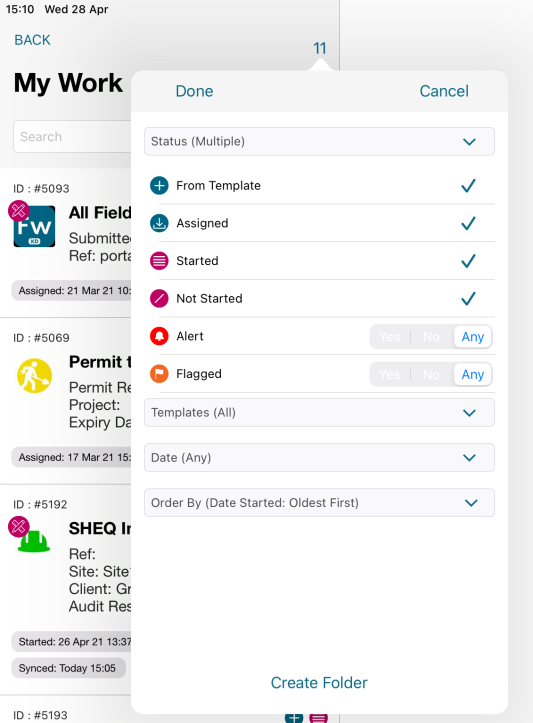
There are a wide range of filter options including:
-
Form status
-
Template type
-
Date (started, saved, assigned etc)
-
Any form meta data applied to assigned forms.
Form lists can also be ordered by:
-
Date started
-
Date last saved
-
Date assigned
-
Reference Text
-
Template name
-
Recent Activity
Filtered lists can be viewed temporarily by tapping done.
Filtered lists can be permanently saved by creating and naming a new folder. Tap Create Folder at the bottom of the filter dialog box). The new folder will be saved in the main menu with the default folders.
To delete a custom folder - simply drag the folder in the menu to the left and tap delete 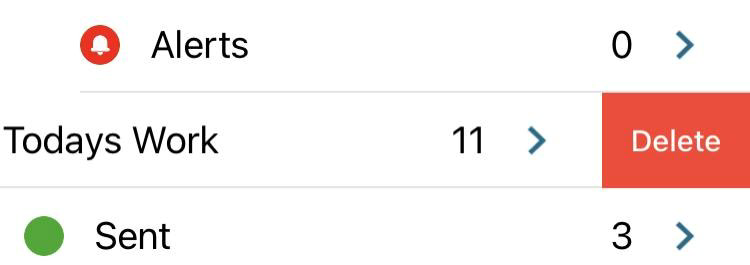
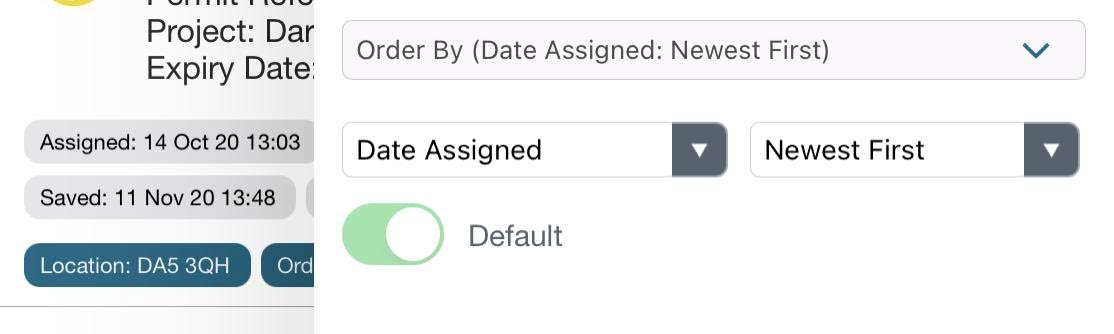
Default List Ordering
Default folders and sub folders have a default listing order. This can be changed in the filter menu under the “Order by” selector - by selecting the sort criteria (e.g. last saved), the order (e.g. Newest first) and setting the default slider so that it is green.
App Syncing
Syncing
When logged in and connected to the internet, the App syncs automatically with the server. The syncing process keeps the server and App in step, ensuring that changes made to forms on the App are uploaded to the server and ensuring that changes on the server (e.g. databases, assigned forms) are sent down.
Whilst connected, the App continues to sync whilst in background mode on the device, provided the user is logged in.
Syncing takes place automatically but can be triggered manually by pulling the menu down
The App is designed to work offline and will sync automatically when a connection is made.
The App sync status can be seen seen as follows:
|
Icon |
Location |
Meaning |
|
|
Top of menu |
App has synced with the server - all forms and databases are up to date |
|
|
Top of menu |
App is syncing. Other syncing statuses include “connecting” , “syncing databases” and “downloading” |
|
|
Top of Menu |
App is offline so is unable to sync with the server |
|
|
Base of menu |
There are form changes on the App waiting to sync up |
|
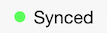
|
Base of menu |
All form changes have synced with the server. |


If the user logs out of the App, or removes it from memory, it will immediately cease syncing.
Multiple Device Use
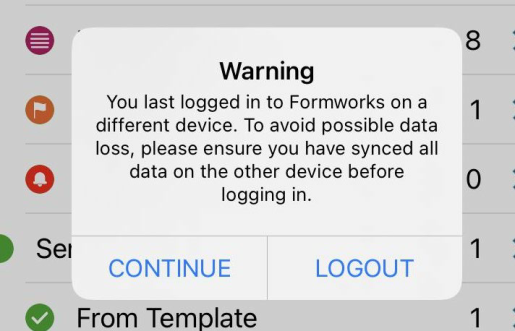
FORMS App users can access their forms on multiple devices, although only one device may be logged in at a time to ensure that data is not compromised.
Logging in to a second device automatically logs a user out of the first device and presents the user with the following warning on the second device.
When using multiple devices, users must take care to ensure that their first device has synced all changes to the server before logging onto a second device. Failure to do this may result in data loss.
WARNING - OFFLINE WORKING
Users should be aware that offline working will prevent the automated syncing and warning processes from operating when switching between devices because the App is not connected to the server - meaning that data changes on a first device cannot be updated on a second device, resulting in potential data loss.
App Settings
Selecting the Cog Icon at the bottom of the menu screen takes the user to the Settings Screen. This screen is split into four tabs, the Status, Data Transfers, System Log and User Settings.
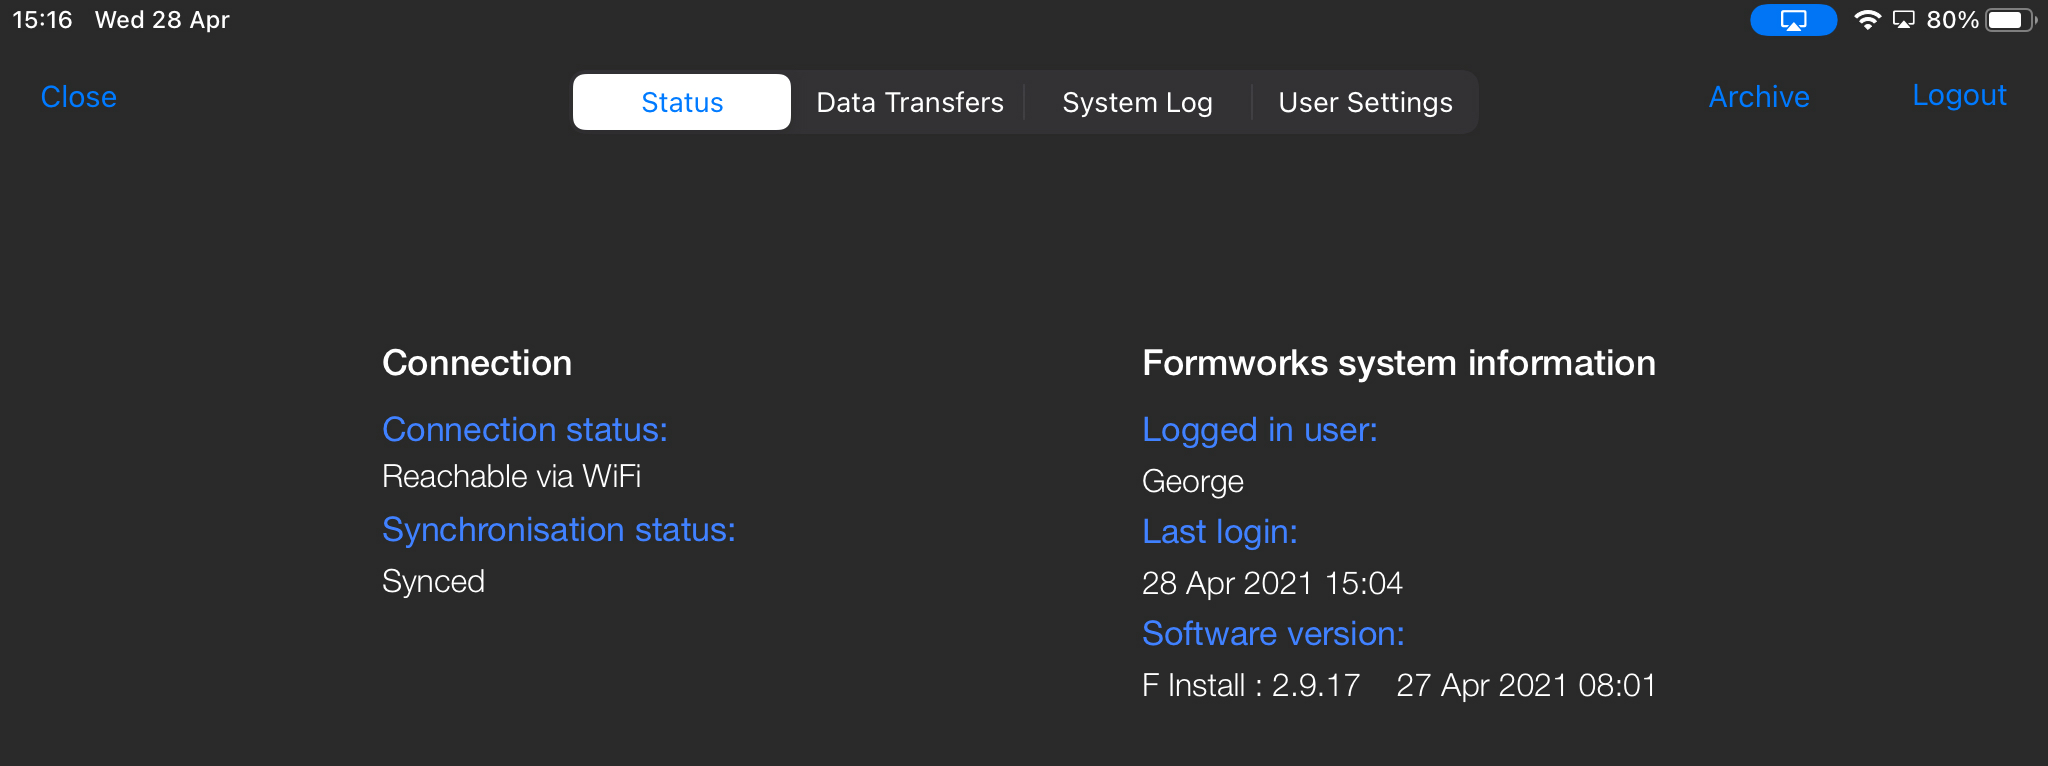
This screen includes the following:
FORMS system information
This displays information relating to the device user; their FORMS account name, the date and time of their Last login, and the Software version of the FORMS application.
Connection Information
This section displays the connection status, when the user last connected to the FORMS server, and the Synchronisation status.
Archive Function
This option uploads a backup ofthe App user’s template and form databases and system logs to the FORMS server for troubleshooting and recovery purposes. Access to the Archive function requires a PIN that can only be supplied by Digital Field Solutions support staff.
Logout Function
Logs the user out of the FORMS application
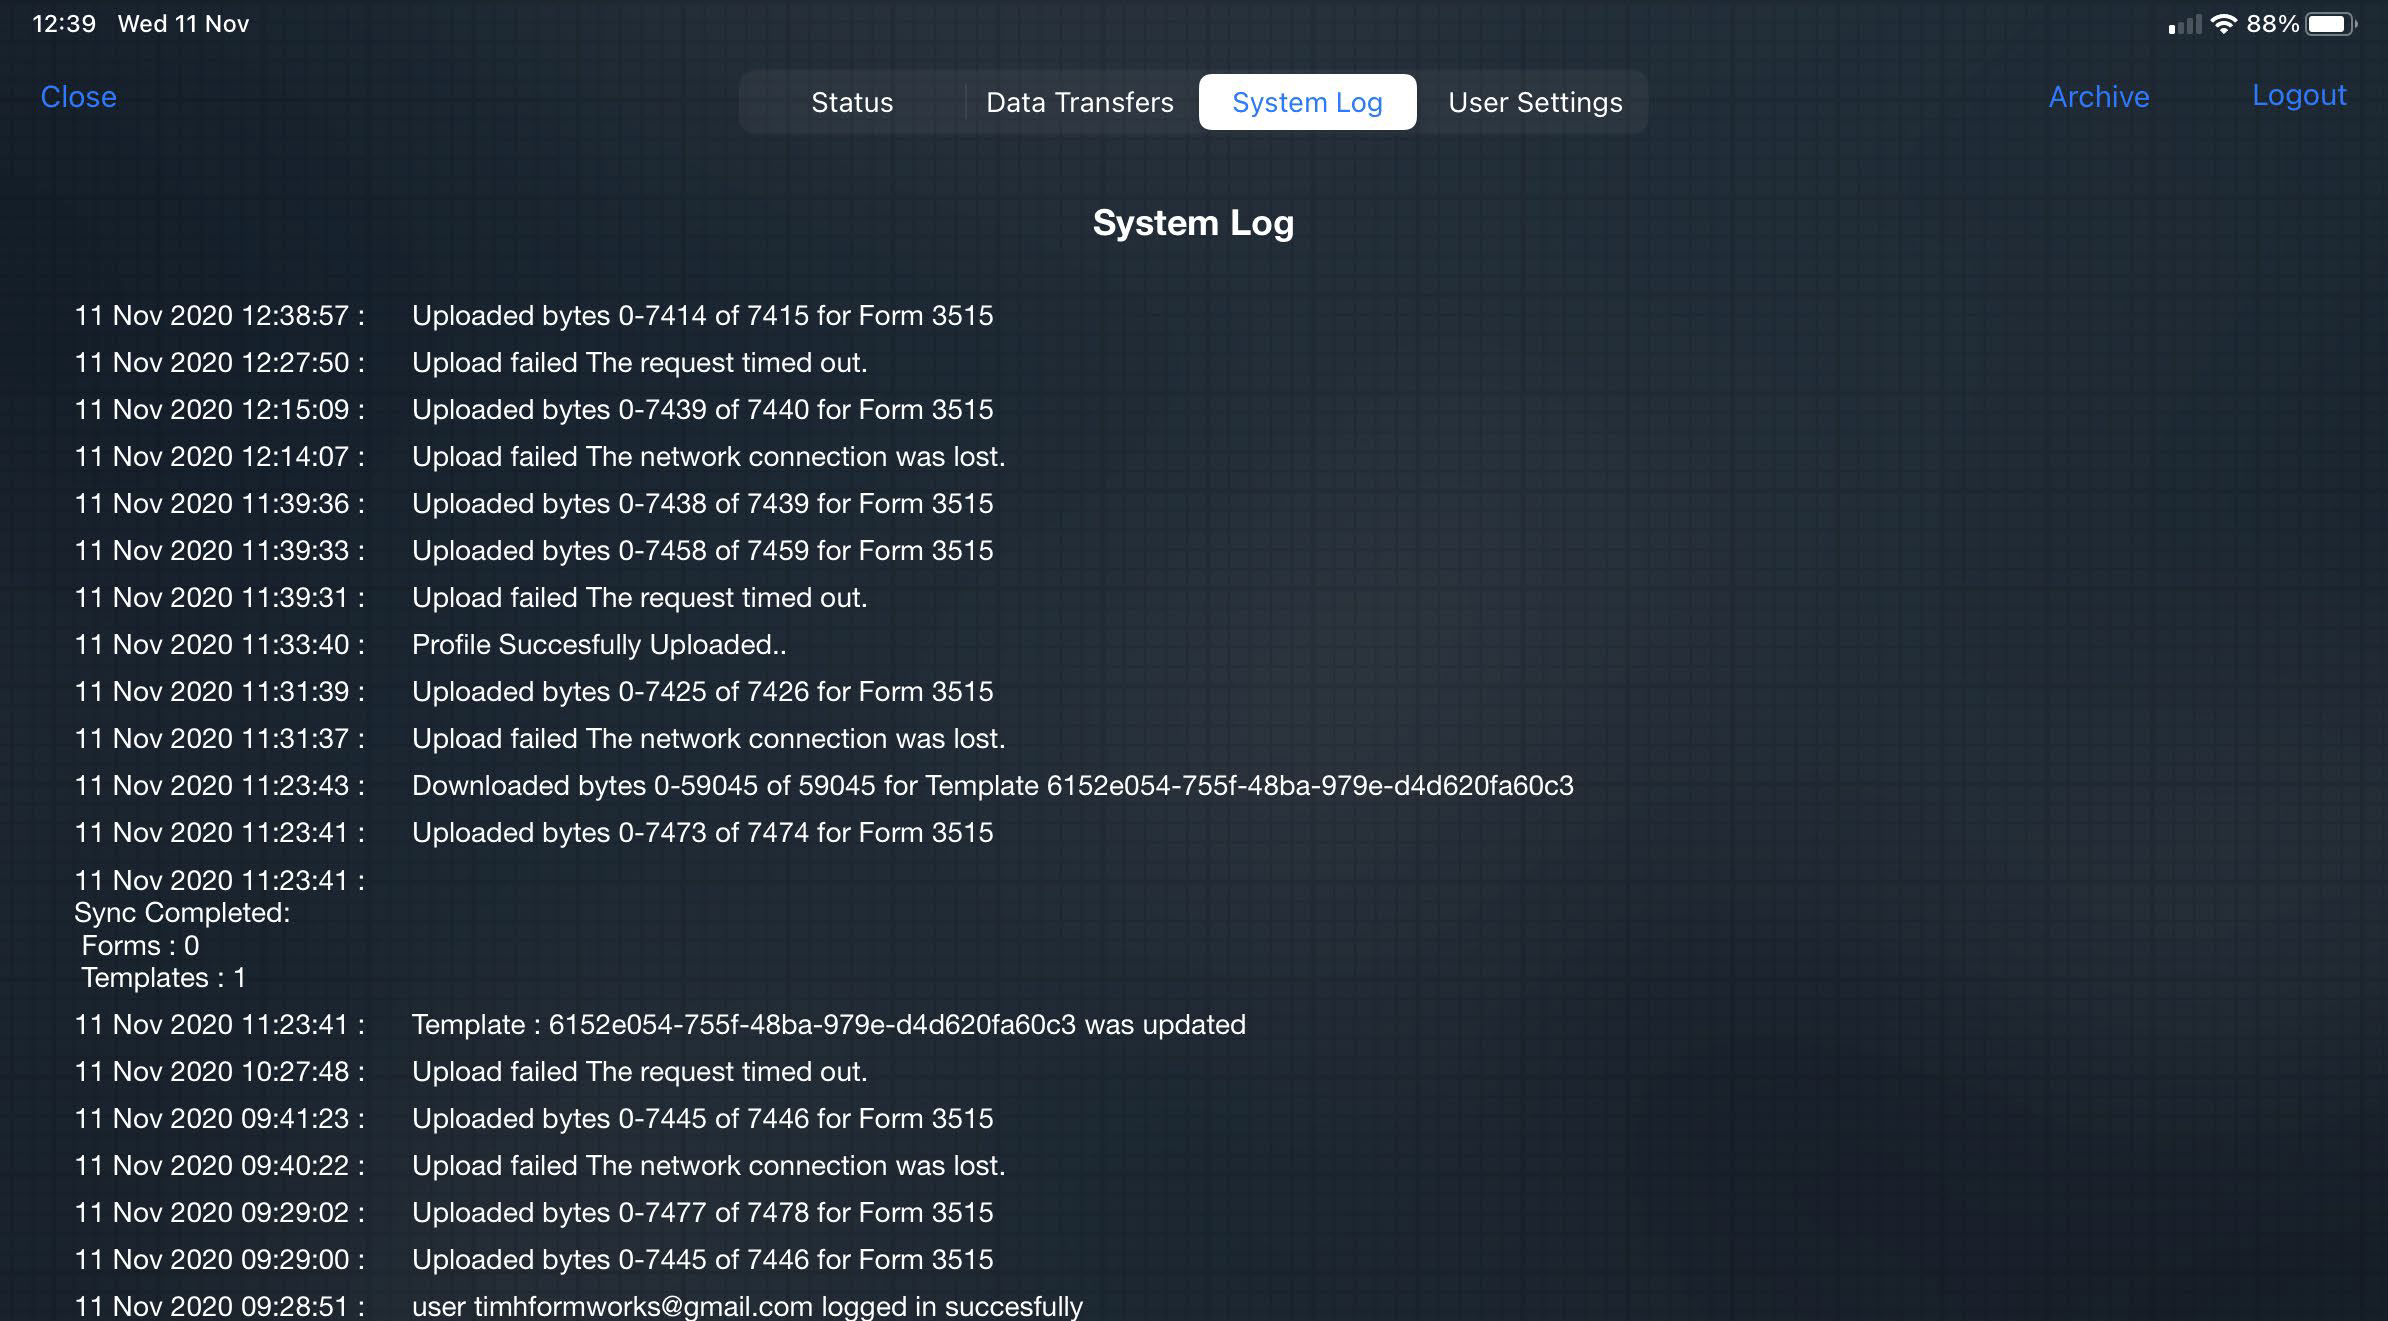
System Log
This is a simple, short term record of the data movement between the device and the FORMS portal.Support staff may require a user to relay information from this screen to them in the event of a technical issue.
User Settings
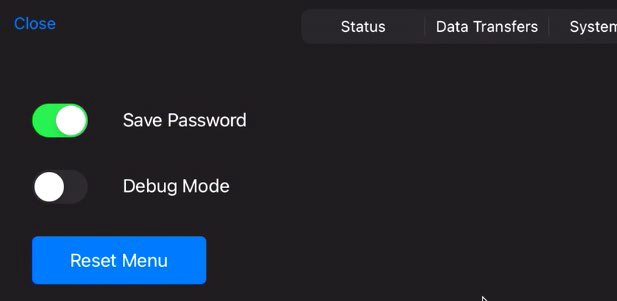
The user Settings tab performs three functions:
-
It permits the device user to change the setting to remember the password used to access the FORMS App on their device.
-
It enables the user to select de-bug mode. Please Note - this is a feature used by Administrators and Form designers to test forms that are “In Design”. It should not be enabled by form users.
-
It enables the user to reset their menu folder structure back to the default.
Data Transfers
This page shows the sync status of individual databases, forms and templates.
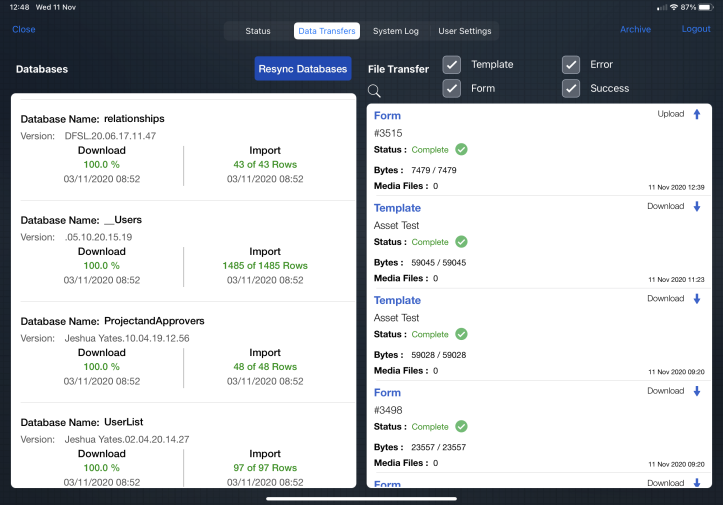
Databases
This area provides details on Local Databases that are available to the templates on the device.There are two stages required for Databases to be available to templates, Downloading to the device, and Importing. Both of these processes are tracked in this section.It also details the Database version names and dates of upload to the FORMS portal. This is to prevent the use of out-of-date information.
The option to resync databases is available in the event of sync problems
File Transfers / Audio Clips
This area displays the progress of forms and templates as they sync with the FORMS server.
Completing Forms
Form Navigation
Tapping on a form listing in the menu folders will activate a new, in progress or previously submitted form template so that further data can be added.
Tapping any field on the form will enable data to be added
The main form navigation controls are as follows
|
Icon |
Location |
Action |
|
|
Top left |
Open menu |
|
|
Top left |
display notifications |
|
|
Top right |
List pages, change page |
|
|
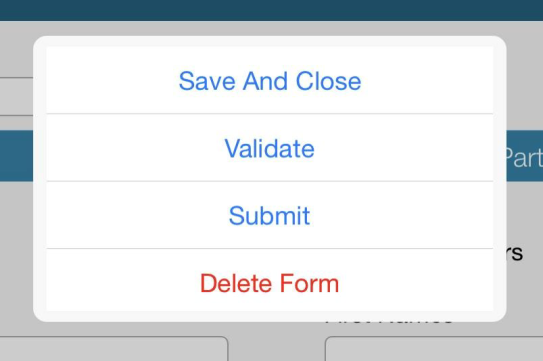
Top right |
Action menu including: ●Save and close form (returns to menu) ●Validate (starts data validation process according to form configuration) ●Submit (includes validation) ●Delete form (deletes form permanently from the App) |
|
|
Bottom left and above keyboard |
Enables the user to tab between fields on the form |
|
|
Bottom left and above keyboard |
Enables the user to tab between pages on the form |
|
|
Bottom right |
Activate audio recording - only applies to those forms with audio enabled |


Special Fields
Some fields have special properties, and selecting them provides additional functionality:
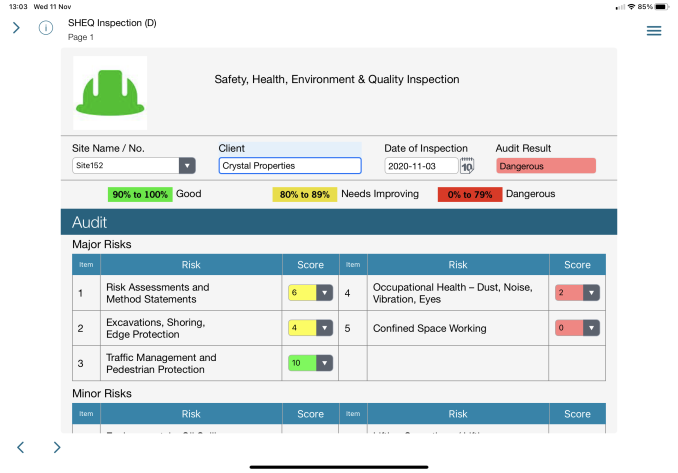
Date / Calendar
Selecting a date field will present the device user with a calendar.If validation script is running in the form, certain date ranges may not be available.For example, any dates beyond five days may be greyed out and disabled. 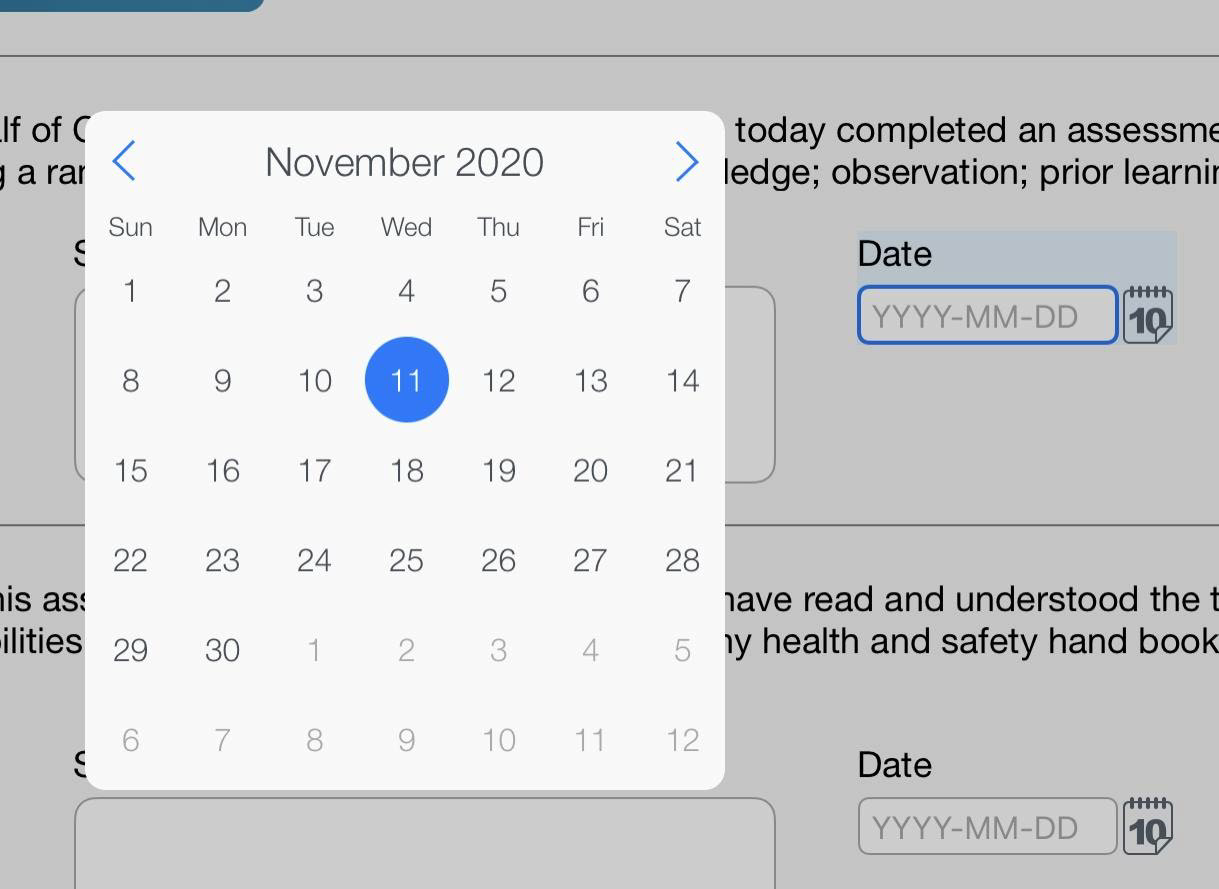
Users can type directly into the date field if they wish. A range of formats can be entered which are then converted to a standard YYYY- MM-DD format on leaving the field. Accepted input formats include:
-
18051960 -> 1960-05-18
-
180560 -> 1960-05-18
-
600518 -> 1960-05-18
-
19600518 -> 1960-05-18
Time Fields
Time fields accept 24 hour times and users can simply type in 4 numbers, and they will be converted to a 24 hour time on exiting the field:
-
0930 -> 09:30
-
1234 -> 12:34
Invalid times are not accepted by the field
Text fields
Depending on the type of text field on a form, the text box will accept a range of characters
-
Text field, accepts all characters
-
Number field accepts: -123457890.e
-
Phone, accepts: -()+0123456789
-
Email: must have an @ followed by a . at least 2 characters after otherwise it will fail the validation process.
Signature
Touching the signature element on a form opens up a window on the device to obtain a signature which is date and time stamped. A stylus or finger can be used to obtain this. 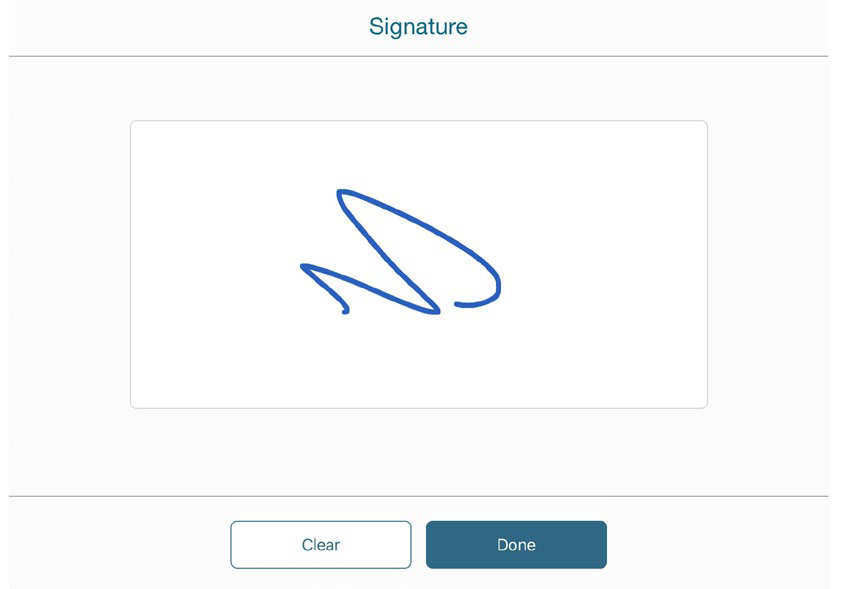
Select Clear to remove the signature, or Done to capture it and return to the form, with the signature displayed as a reduced element. Select Cancel to return to the form without saving any changes.
Barcode Reader
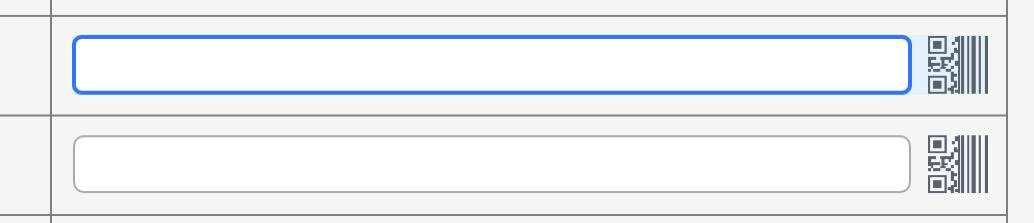
Tapping the barcode icon to the right of the text field activates the device camera which can be used to read a barcode - and return the value into the text field.
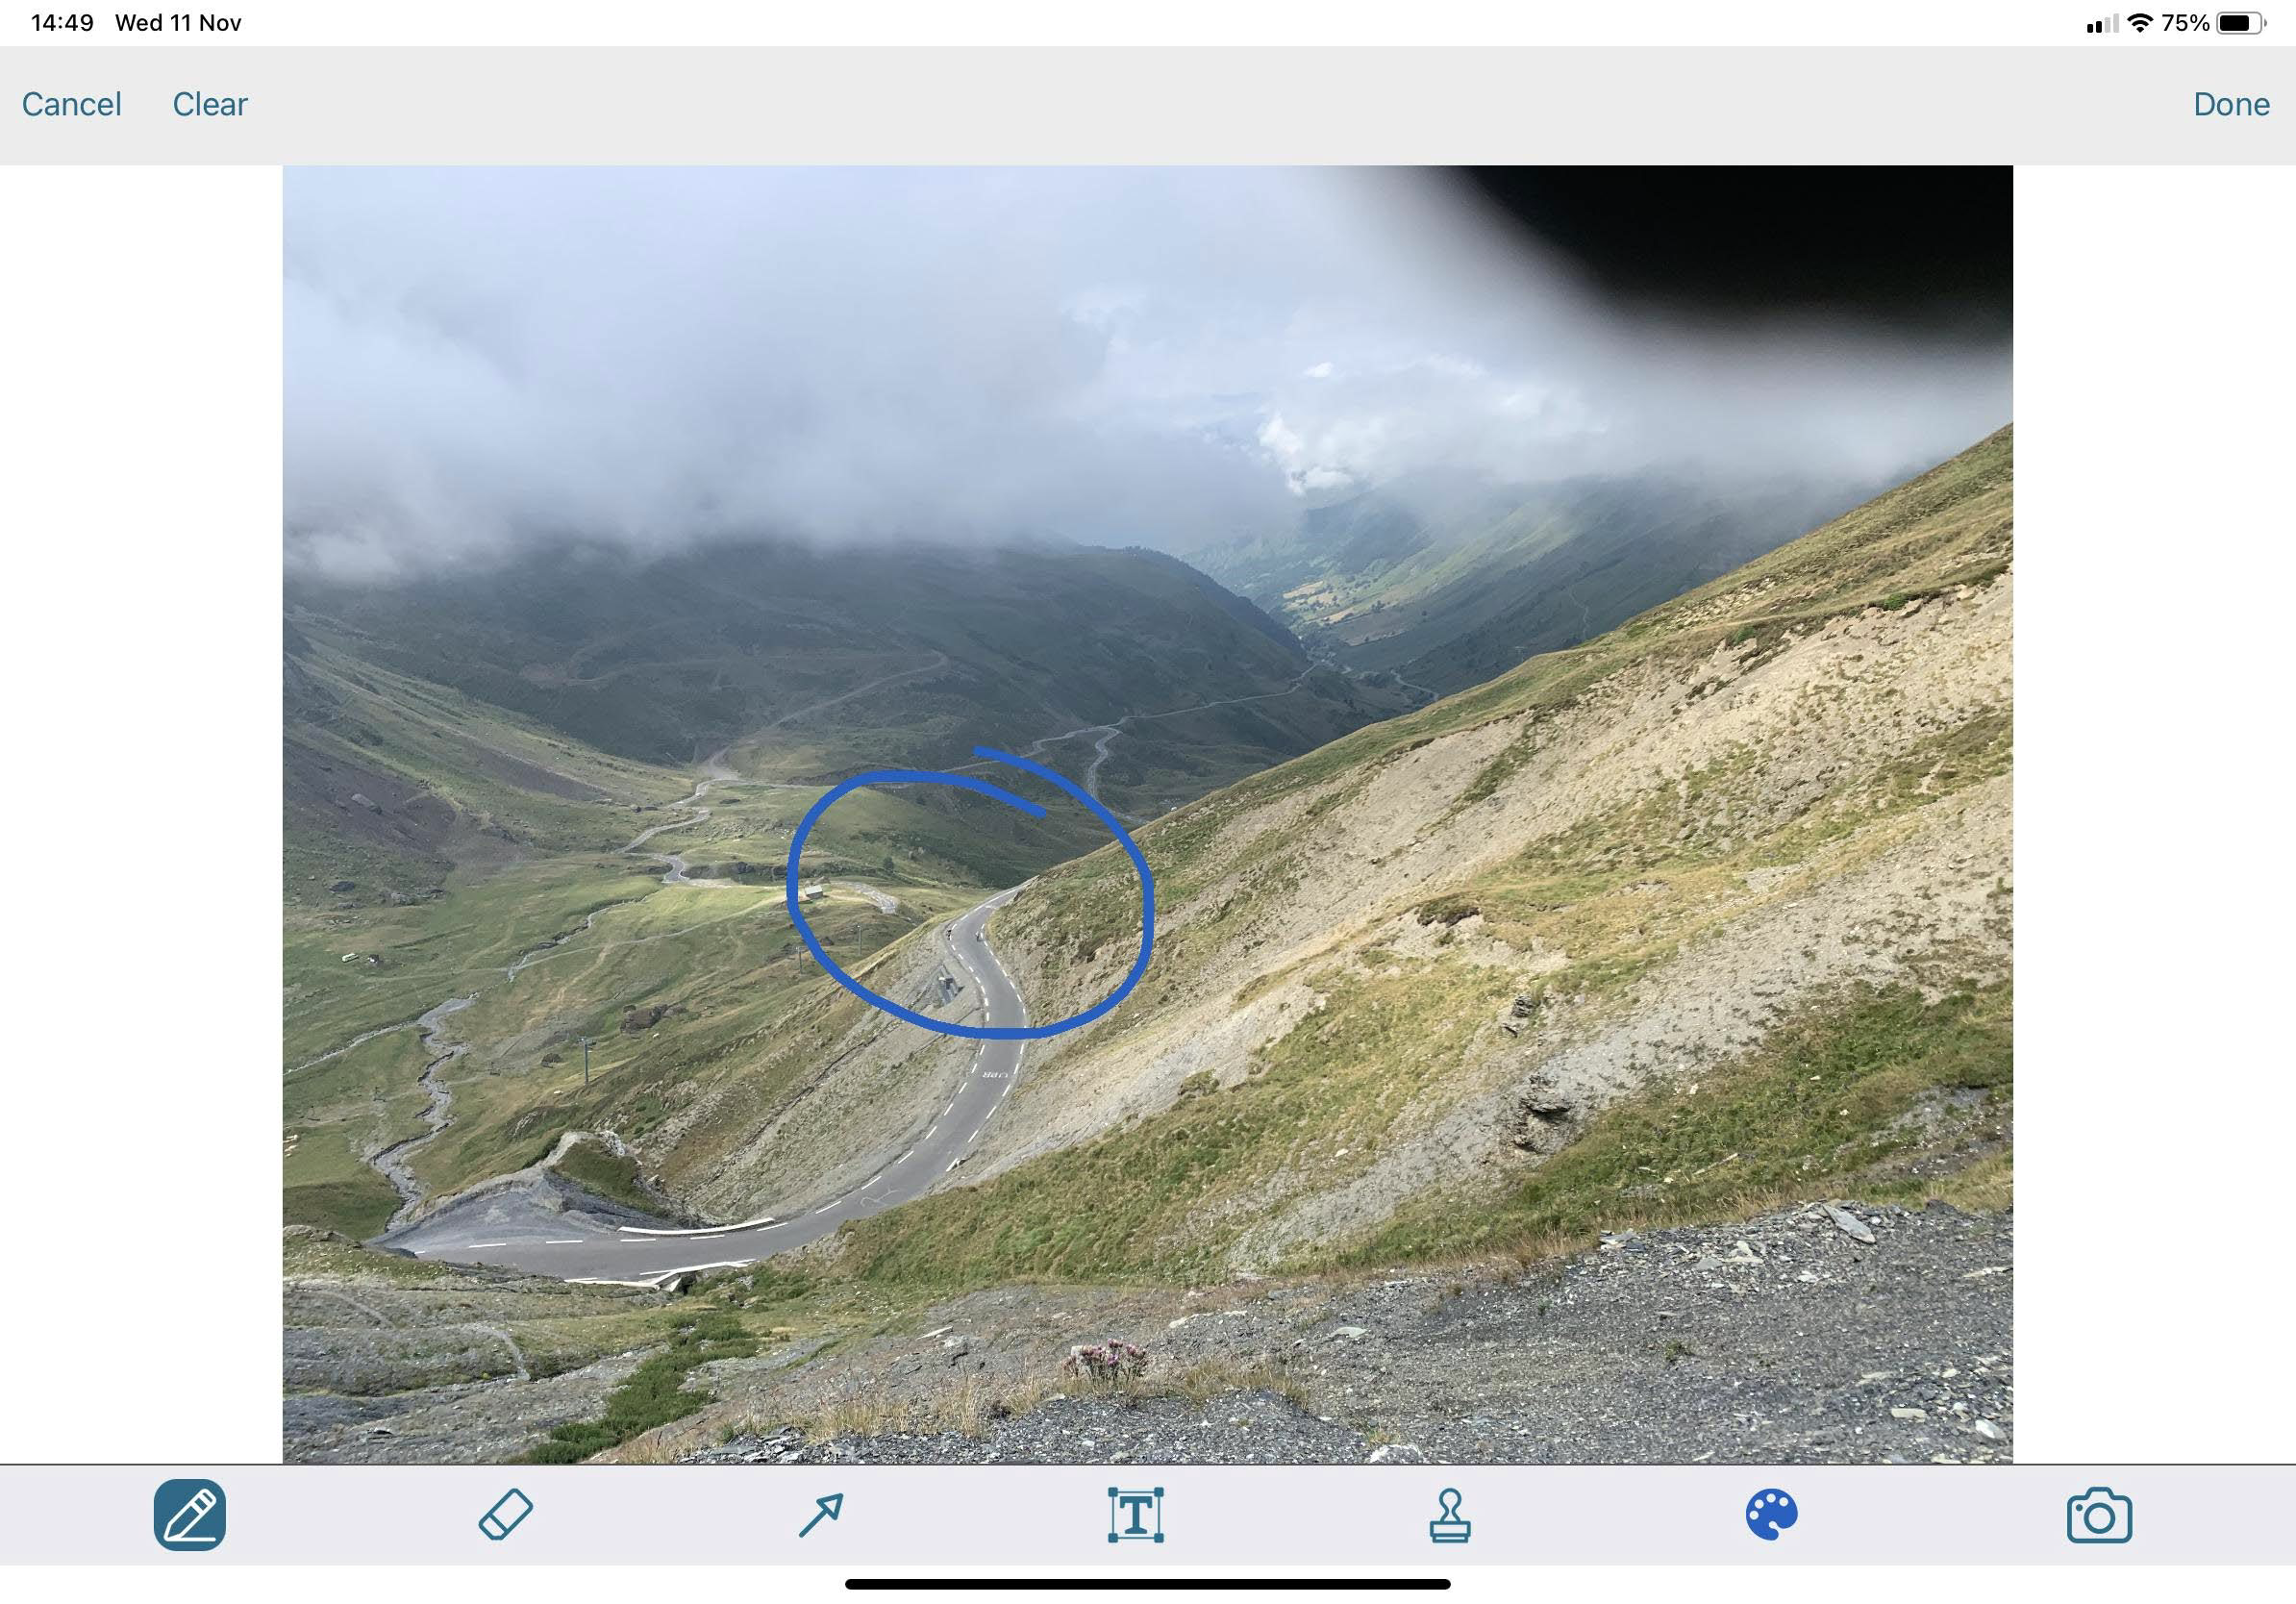
Sketch
Selecting the sketch field opens an area where you can create a sketch or mark up a background drawing. 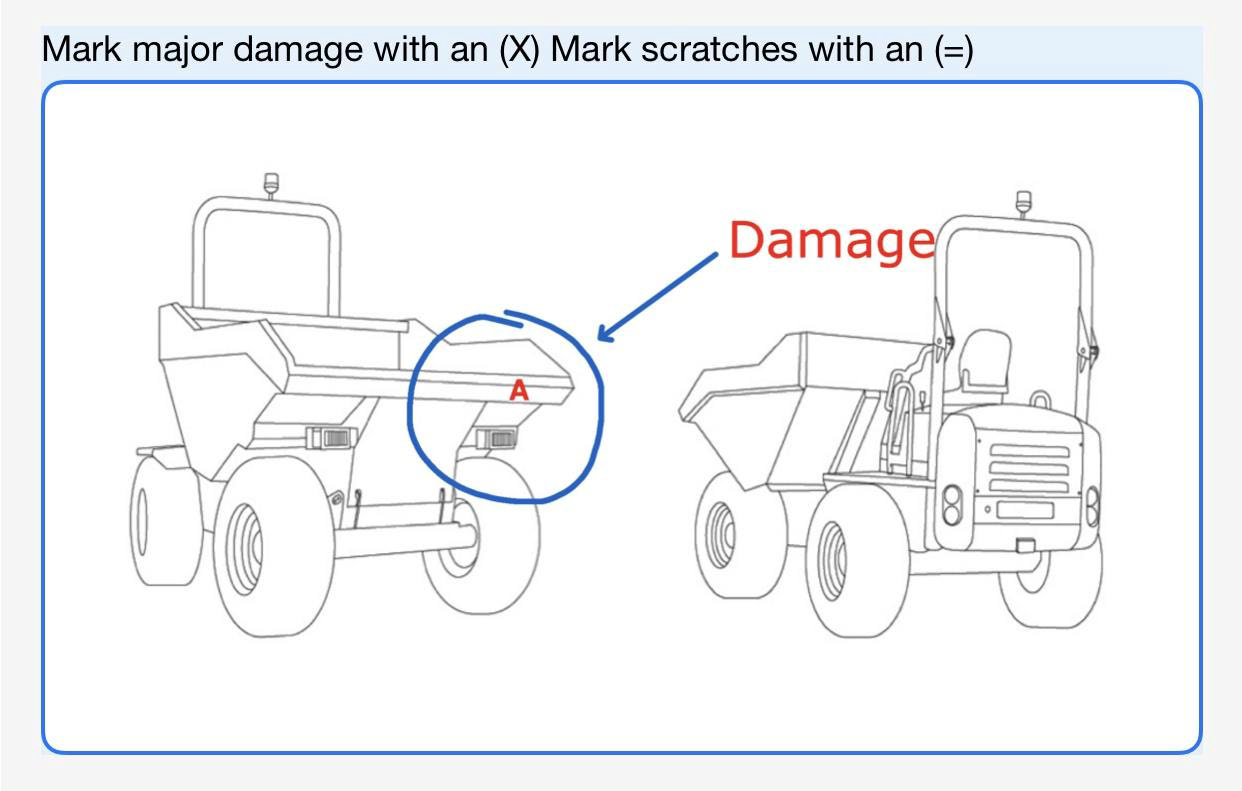
Depending on the form configuration, the sketch field may have simple grid background for free sketching or a background as per the images here. Tapping the sketch field opens the sketch interface shown below.
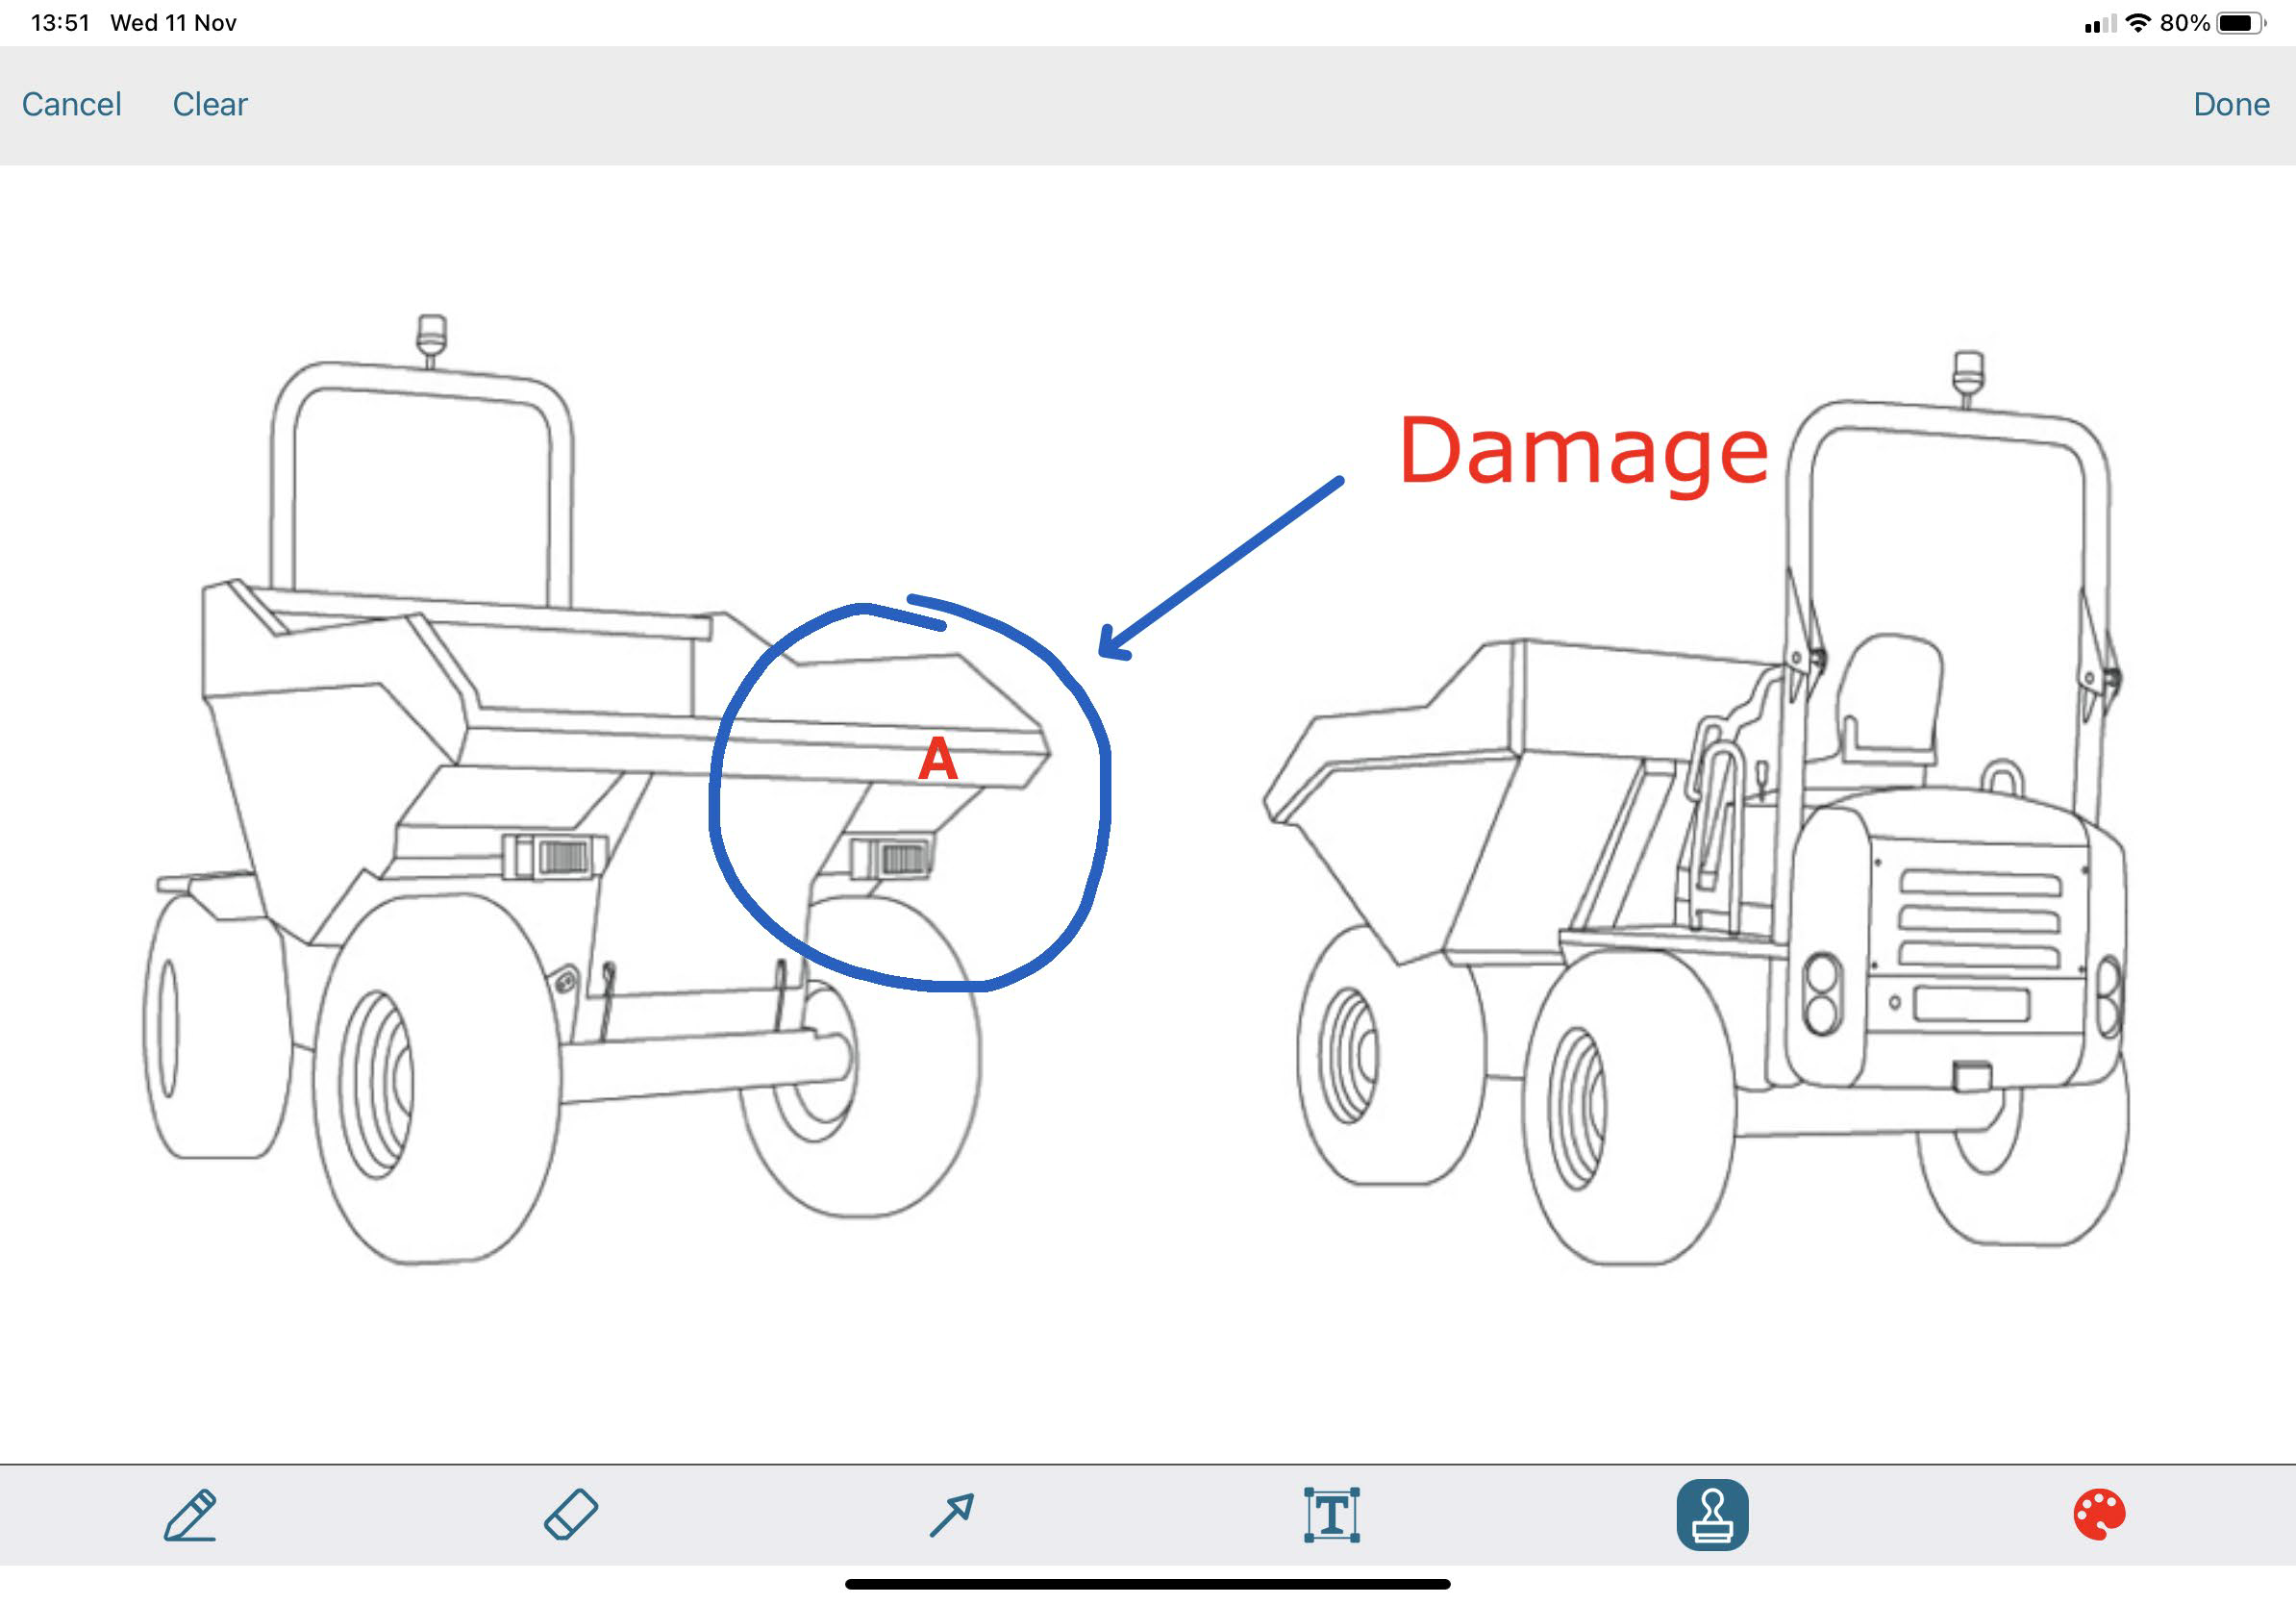
The sketch controls include:
|
Icon / Control |
Location |
Action |
|
Cancel |
Top left |
Cancels action and returns to form |
|
Clear |
Top left |
Clears the mark-up |
|
Done |
Top right |
Saves the changes made and returns to form |
|
|
Bottom left |
Allows the user to free sketch using finger or pen |
|
|
Bottom left |
Erases previous mark-up. Simply rub over the area to be erased. |
|
|
Bottom mid |
Arrow function - enables arrows to be drawn |
|
|
Bottom mid |
Add text. Tapping the icon and the location the text is required opens a dialog in which to enter the desired text. Once added, the text can be re-sized by tapping on the text or moved by touching and dragging it. |
|
|
Bottom right |
Stamp tool. A number of character and symbol stamps can be placed on the sketch. Select the character icon from the list, then touch the sketch area to place it. Touching a character on the sketch area a second time highlights it for deletion. A character can be moved by touching and dragging it. Characters are displayed in the currently selected colour, the same as the pen. |
|
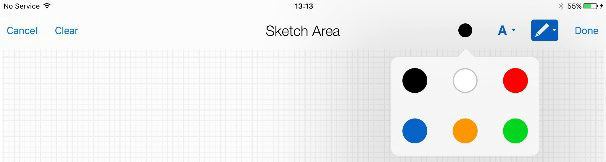
|
Bottom right |
selected for the pen strokes and characters.Six colours from the palette can be chosen by selecting the coloured circle. |


Adding Photos
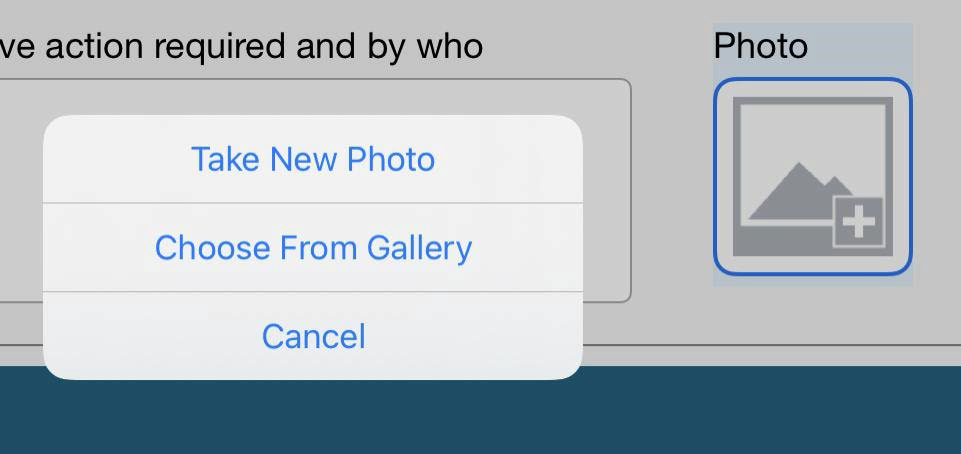
Selecting the photo element opens a dialogue box allowing you to either take a new photo using the device’s camera, or select a photo from the Camera Roll.
Selecting Take New Photo opens the device camera with the normal functionality.
Whether opting to take a new photo or upload one from the camera roll / gallery, the user has the option of adding mark-ups using the same functions as the sketch element.
The Clear function allows clearing the photo mark-ups, or the entire photo.
Operation of Audio Clips on device
Audio clips can be recorded as part of a form completion process. Audio files are synced to the server alongside a form when it is saved or submitted.
Recording Clips
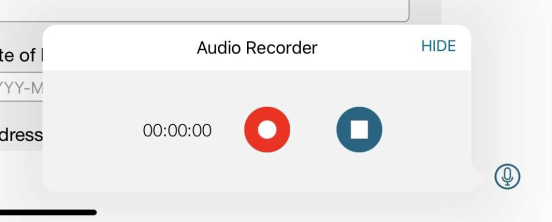
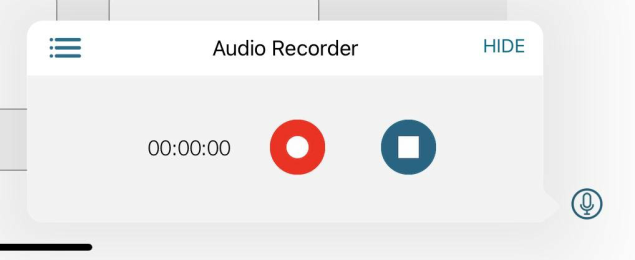
If a template has been enabled to use audio clips, a blue microphone symbol will appear at the bottom right of the screen.
Selecting the microphone icon will cause a red Record, and a blue Stop icon to appear to the left of the microphone.
Tapping the red Record icon starts a recording. The timer starts to run and the blue microphone icon turns red and rotates.
Tapping the red icon toggles between pausing and re-starting the recording.
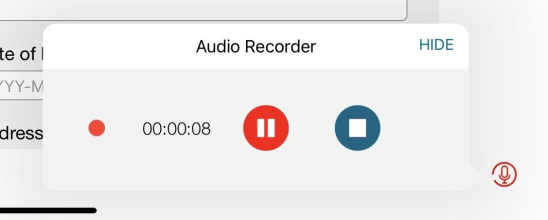
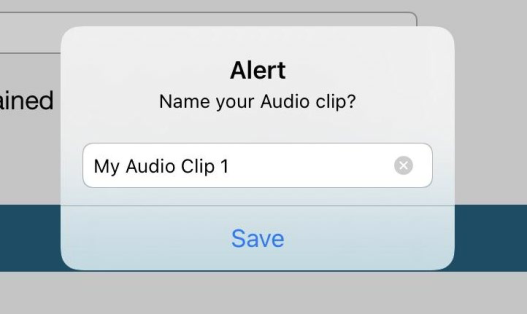
Tapping the blue icon stops the recording and presents a dialog box to enable the audio file to be named and saved.
Accessing Saved Recordings
To display saved clips, tap the microphone icon followed by the hamburger menu in the top left of the recording dialog box.
In the list of recordings, audio clips can be re-played and (if permitted by the system administrator) deleted by tapping on the relevant clip.
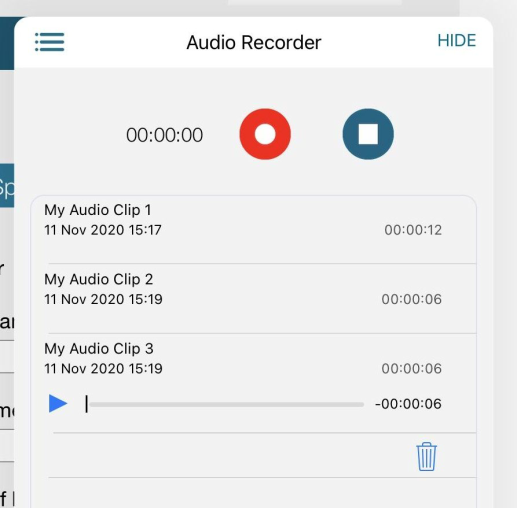
The Template Designer has the option of preventing the deletion of recordings.If this option is used, the trash can will not appear beneath recordings. (But this does not prevent the user from deleting the entire form, thus removing the audio recordings with the form. The only way to completely protect recordings is to use a prefilled form, set to prevent the deletion of prefilled forms).
Exceeding the Recording time limit
If the device user tries to record an Audio Clip longer than the maximum period specified in the Template Designer, the recording will automatically terminate at the predefined maximum length. The device user will see a warning message dialogue box. When they select OK, they will be prompted to enter a name for the Audio Clip and save it. This could happen for example, if the user starts a recording and leaves the device unattended, as recording will continue even after the users’ device has entered sleep mode.
Exceeding the Maximum Number of Recordings
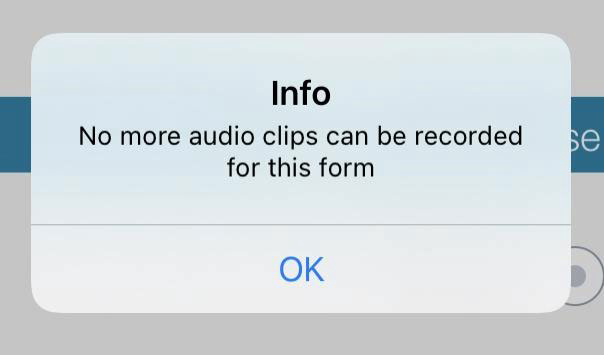
If the device user tries to record more Audio Clips than the number defined for the template on the Template Designer, they will receive a warning message and be prevented from creating further recordings. To create more recordings they would first need to delete one or more existing recordings. Obviously if the template settings prevent the device user from deleting recordings, this could cause issues.
Changing Templates whilst recording an Audio Clip
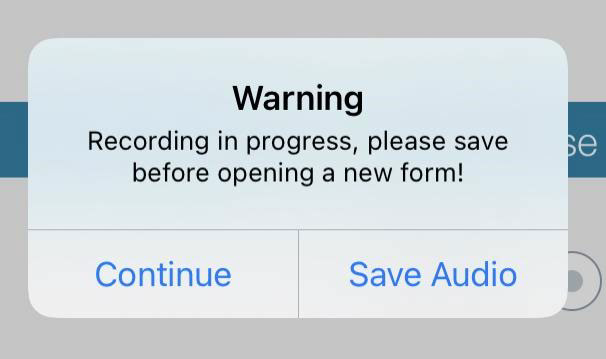
A device user cannot change the template they are making a recording against, without first stopping and naming the recording.If they try to change templates, they will be presented with a warning, and options to stay on the form or save the audio and leave.
Potential Audio Interruptions
There are circumstances when audio recording may be interrupted by the device operating system, other Apps that utilise the microphone or by the FORMS App itself. The table below summarises some of the main possibilities:
| Action | Impact on recording |
|---|---|
| Device enters sleep mode | Keeps recording, unless audio time limit reached |
| iOS problem (low memory etc) | Recording is stopped and auto saves audio clip under default name |
| Phone call | Recording is stopped and auto saves audio clip under default name |
| Video recording starts | Recording is stopped and auto saves audio clip under default name |
| Skype / Teams / Zoom App calls activated | Recording is stopped and auto saves audio clip under default name |
| FORMS App - enters background mode (i.e. other apps being used) | Keeps recording, unless audio time limit reached |
| FORMS App - force close | Recording is stopped and automatically saved under default name |
| FORMS App - forced log out (e.g. due to logging onto a different device) | WARNING - Session timeout message appears and audio is saved on first device but doesn’t show on second device unless first device is synced before making changes on the second device. POTENTIAL DATA LOSS |
| FORMS App - timeout | Recording is stopped and automatically saved under default name |
| FORMS App - change template | Option to stop and save recording presented to user. |
| FORMS App - view Settings page | Keeps recording, unless audio time limit reached |
Logs
Should it be necessary to view the actual data transfer of Audio Clips between the users’ device and the FORMS portal, this can be done via the File Transfers log in App Settings.
Form Validation
Most form templates will have validation logic built in to them to optimise data quality.
The validation process checks the data entered into a form template against the validation rules.
Validation is triggered by tapping either submit or validation on the action menu. The action menu is displayed by tapping the hamburger button in the top right hand corner of the screen.
When the validation process runs, the App enters the validation mode, presents a list of errors and highlights, in red on the form template, data fields that have failed validation.
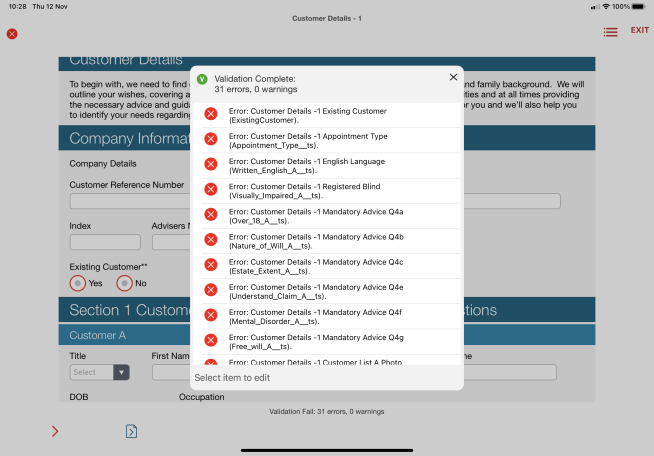
Tapping an error on the list navigates the user to the invalid field - highlighted below

Correcting data error the field data, turns the field green.

The validation controls include:
|
Icon / Control |
Location |
Action |
|
EXIT |
Top right |
Cancels validation mode |
|
|
Top right |
Show error list |
|
|
Bottom left |
Tab between errors on the form |


Validation failure types:
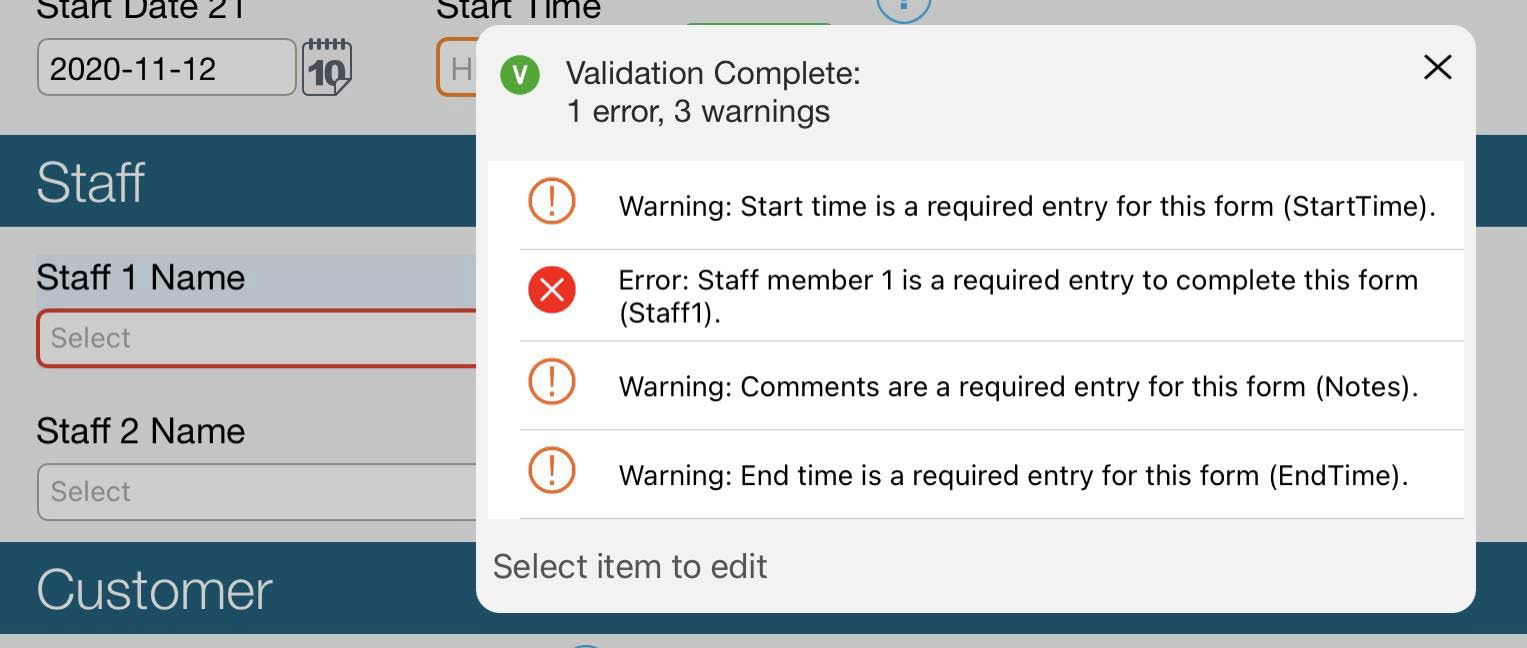
There are two types of validation failures:
-
Error (Red) : Must be rectified before the form can be submitted
-
Warning (Orange) : Advisory only - does not need to be rectified before submission.
Example error types are displayed below:
Basic iOS Housekeeping
Clearing applications from a device’s memory
When an application is opened, it remains open in memory until it is removed.
Allowing too many applications to remain open in memory degrades the performance of the device, and can cause problems with the operation of applications you are running, including FORMS.
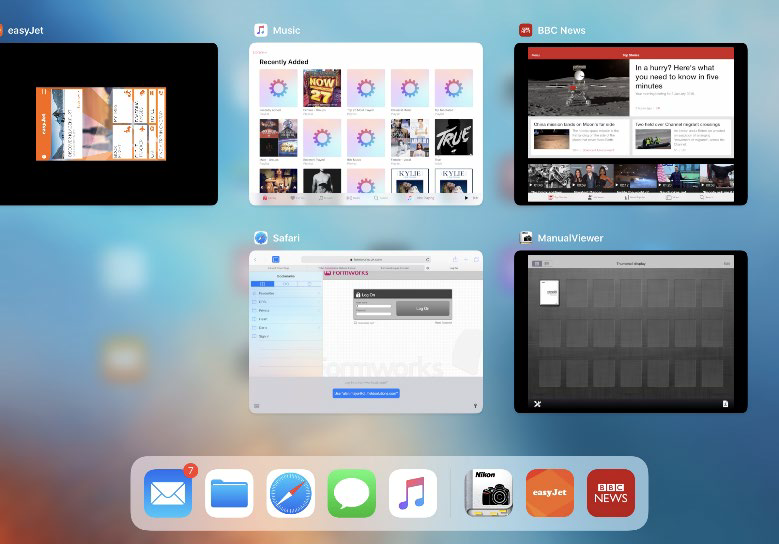
Periodically, applications should be cleared from the device's memory to optimise its performance.This process does not delete the application, it merely removes the application from the device’s memory.
Depending on the device model, double tap the Home button or flick the screen upwards from the bottom. The home button is the only button on the front of the screen. The device’s screen will display any open applications in the middle of the screen, with the most recently used in a line at the bottom of the screen. Touching either the screen representation, or the applications icon would take you into the respective applications.
Place your finger to the open applications and flick them upwards. You can see this movement in this capture. The application will go off the top of the screen, indicating that it has been removed from the device’s memory.